Accessing A Windows 10 VM
Accessing A Windows 10 VM
Requirements
The basic requirements to access the Azure portal and to use the software and services provided by Azure are as follows:
- A subscription to Azure that may be provided by the institution
- A local Windows, Mac or Android tablet, laptop or desktop computer
There is a host of software available in Azure to download free of charge. Among them, Microsoft Access, Microsoft Visio, and Microsoft project would be beneficial to business students. These three software apps can be downloaded and installed on a virtual computer, similar to downloading them and installing them on a personal computer.
Overview of Steps
Diagram 1 summarizes the steps that are required to access the Windows 10 Virtual machine. The step-by-step procedure that expands on the steps outlined in Diagram 1 is presented in the rest of this tutorial.

Diagram 1 Steps for accessing the Windows 10 virtual machine
Step 1: Accessing the VM Resources Page
There are two ways to access the virtual machine that was created earlier. One is to connect to the virtual machine immediately after it is created. The other is to log into the Azure portal and then connect to the virtual machine. Both approaches are outlined here, one after the other.
Method 1 Continuing from the Creation and Deployment of the Machine
After creating and deploying the virtual machine, a message, as shown in the following diagram, will be displayed, indicating that the virtual machine was successfully created.
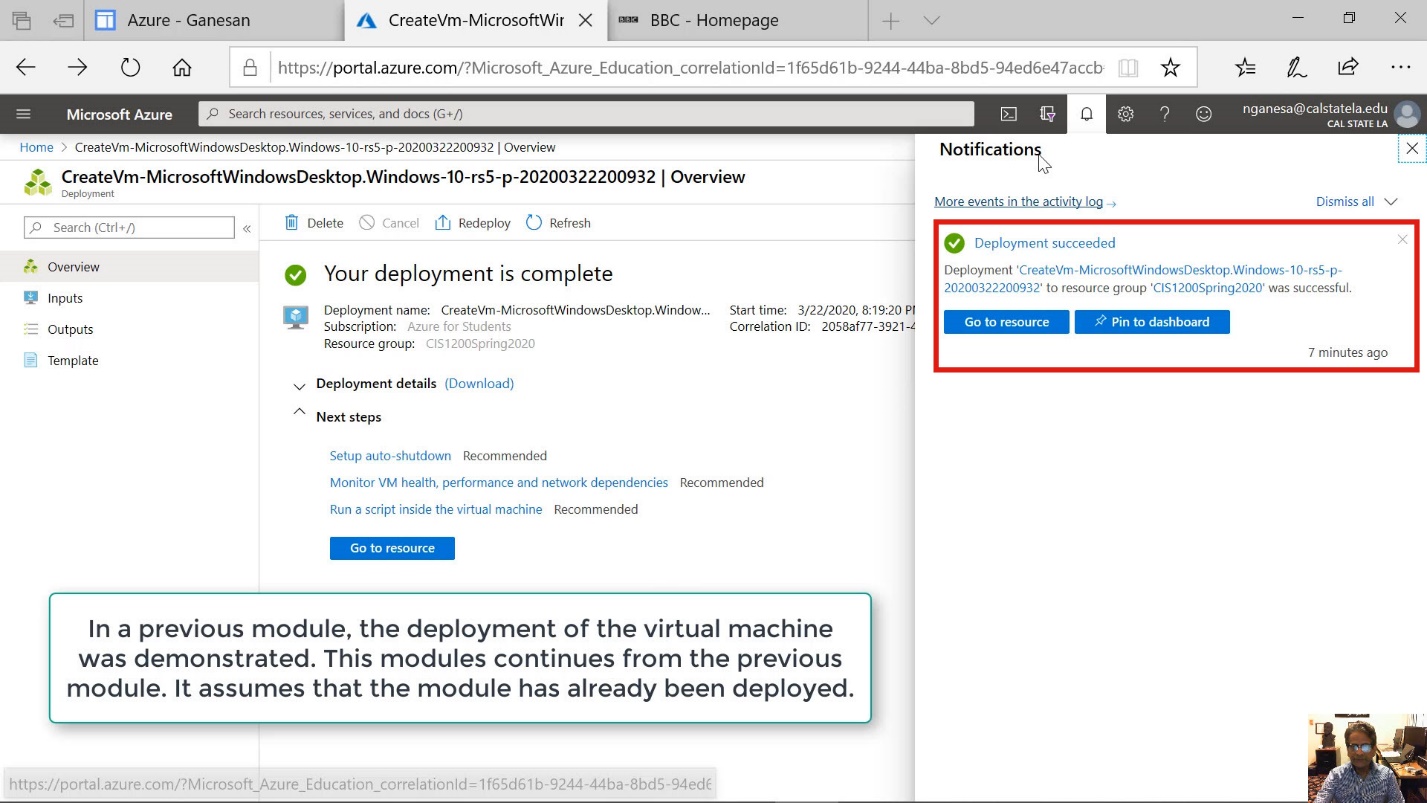
Diagram 2 Message indicating the deployment of the virtual machine
Now, click on the blue "Go to resource" button shown on the screen to access the virtual machine. There are two blue buttons shown. Either one of the two buttons can be used to move to the next step.
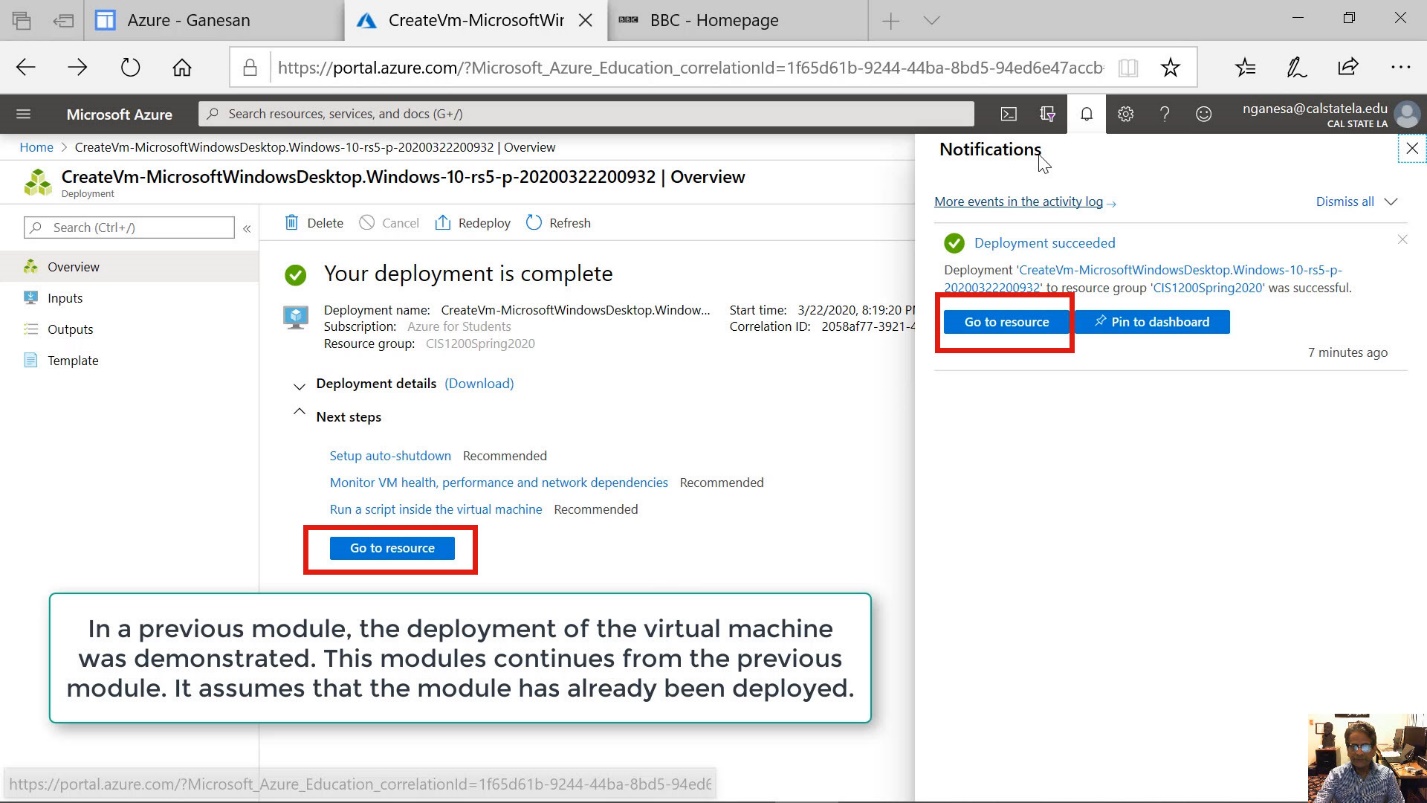
Diagram 3 Options to access the resource screen
At this stage, it is possible to go to the home page by clicking on the Home navigation link, as highlighted in the following diagram. Incidentally, it is the same home page that would be displayed immediately after logging into the Azure portal and clicking on the Home navigation link.
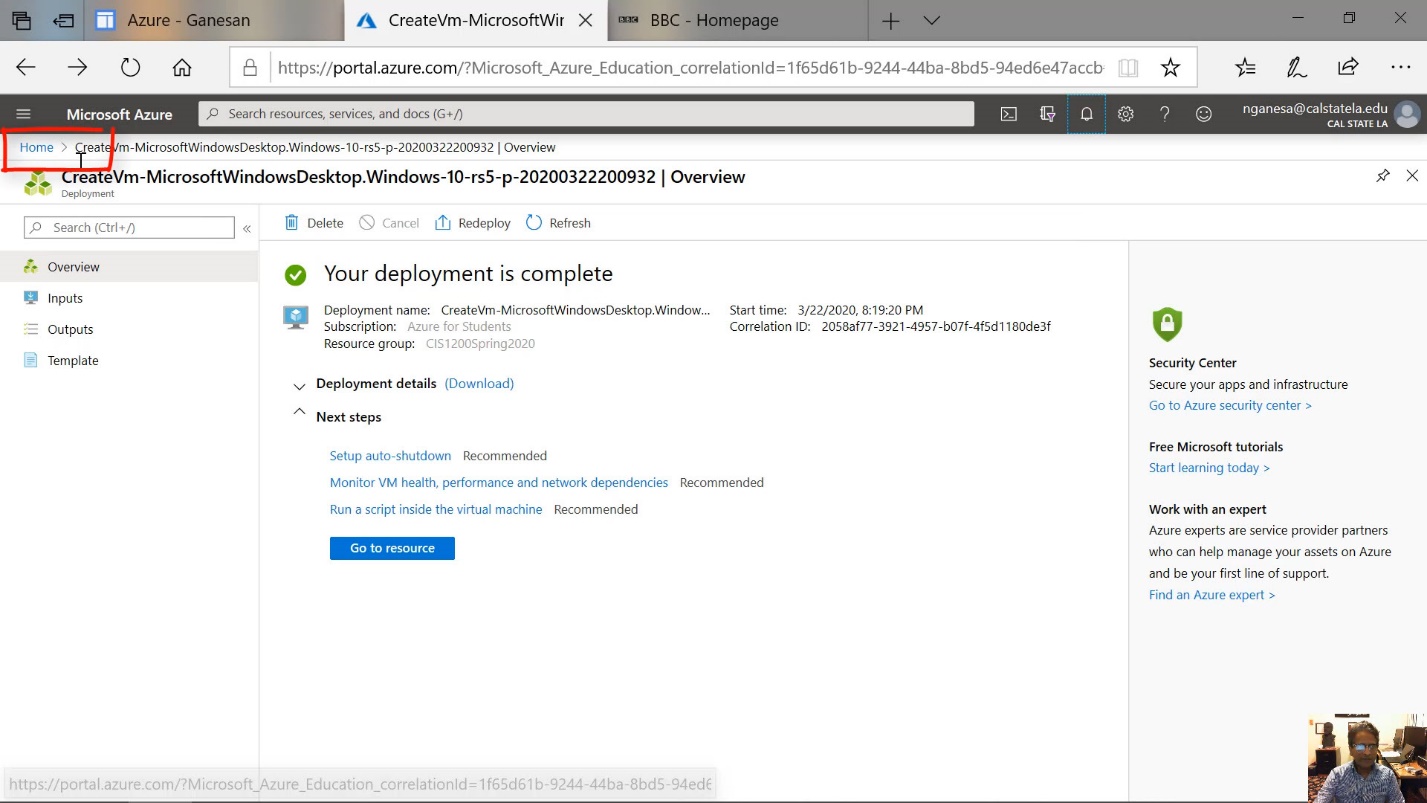
Diagram 4 Accessing the Home page
The next diagram listed under the section entitled Method 2 shows the home page that would be displayed after clicking on the Home navigation link shown in the previous diagram. At any time, it is possible to go to the home page of Azure by clicking on the link on the top left-hand corner of the screen where the navigation link to the home page, labeled as Home, is displayed.
Method 2 Displaying the Home Page by Logging Directly into the Azure Portal
It is likely that the first page displayed immediately after logging into Azure would be the Education Home page. The home page can then be displayed by clicking on the Home navigation link that would appear on the top left-hand corner of the screen. In other words, in both methods, the home page can be displayed by clicking on the home navigation link shown on the top left-hand corner of the screen.
Step 2: Selecting the VM Resource
On the home page, select the entry labeled all resources, as shown in the next diagram.
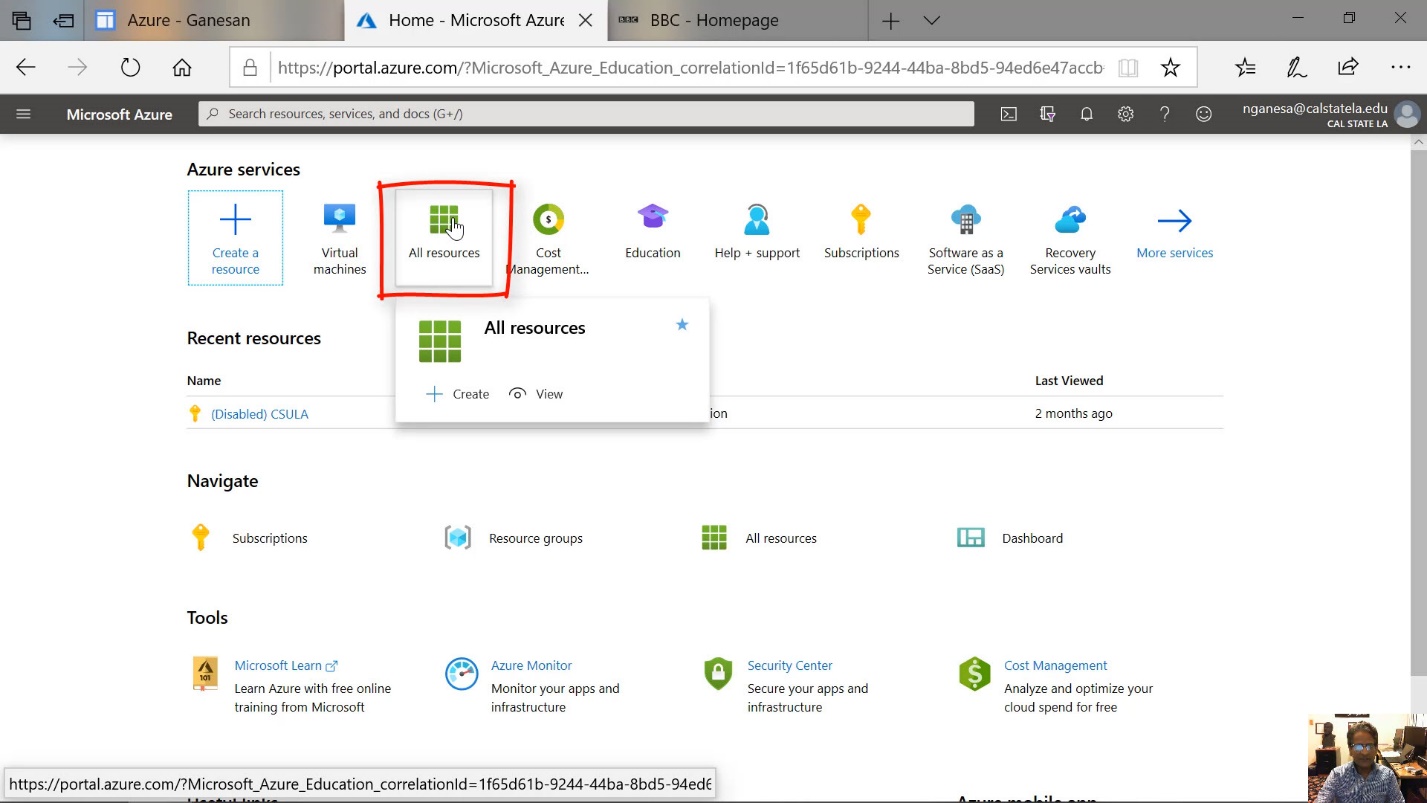
Diagram 5 Accessing the All Resources page
The All Resources screen will be diaplayed next as shown in the next diagram. On this screen, select an appropriate subscription type. In general, only one subscription type will be displayed. Ensure that that subscription type selected is Azure for students.
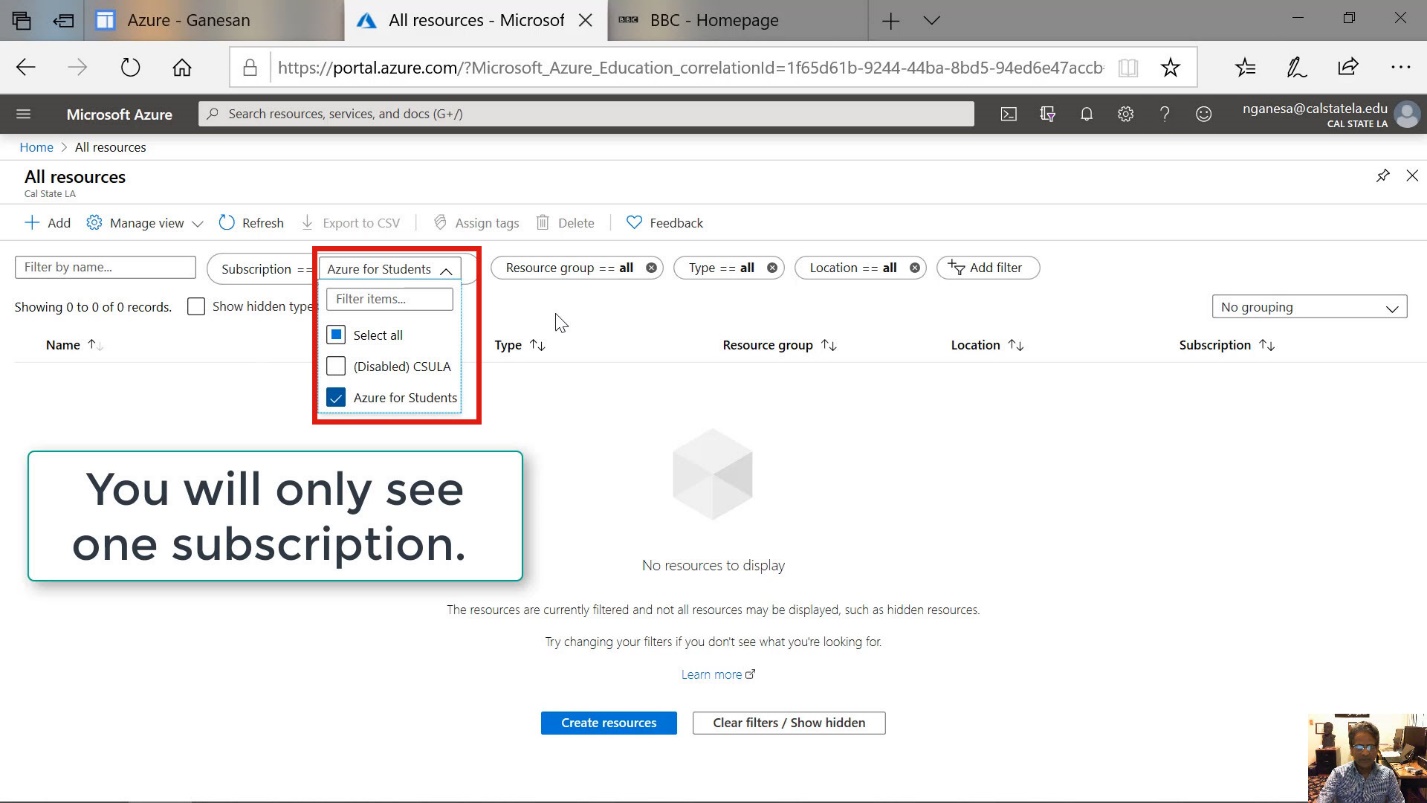
Diagram 6 Selection of subscription type
On the all resources screen, All the resources that were created earlier will be displayed. This would include other virtual machines created, if any, and all the other resources that were created to support the virtual machines. For example, the storage account that was created to support the virtual machine is also listed in the following diagram. At this time, It would be useful to take note of the fact that a public IP address has also been created. This public IP address, shown in a later screen, can be used for accessing the virtual machine the next time when connecting to the machine. In this case, the IP address needs to be specified in the remote desktop application that would be used to access the virtual machine.
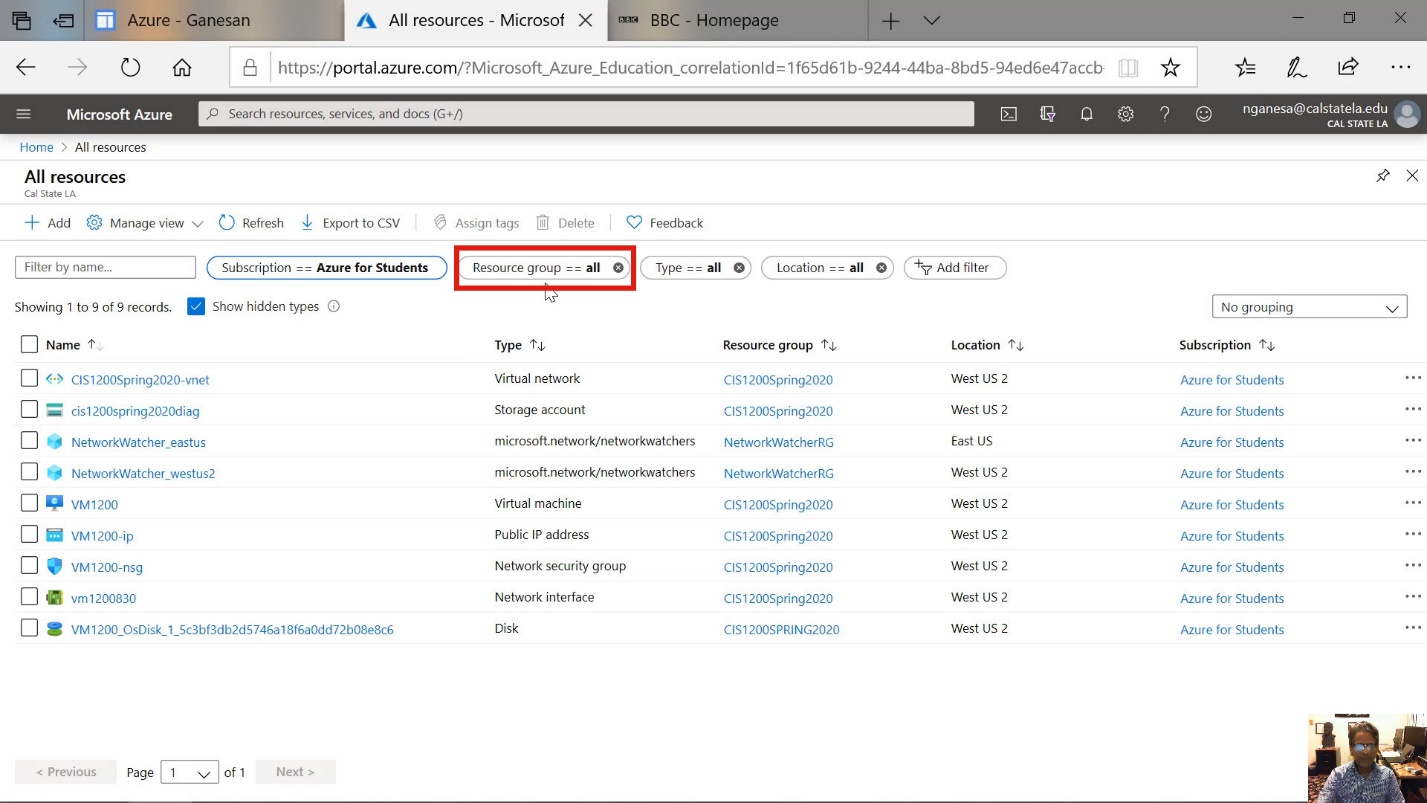
Diagram 7 Display of All Resource groups
The next step is to select the appropriate virtual machine, which would be VM 1200. Select this resource from the list of resources displayed, as shown in the following diagram.
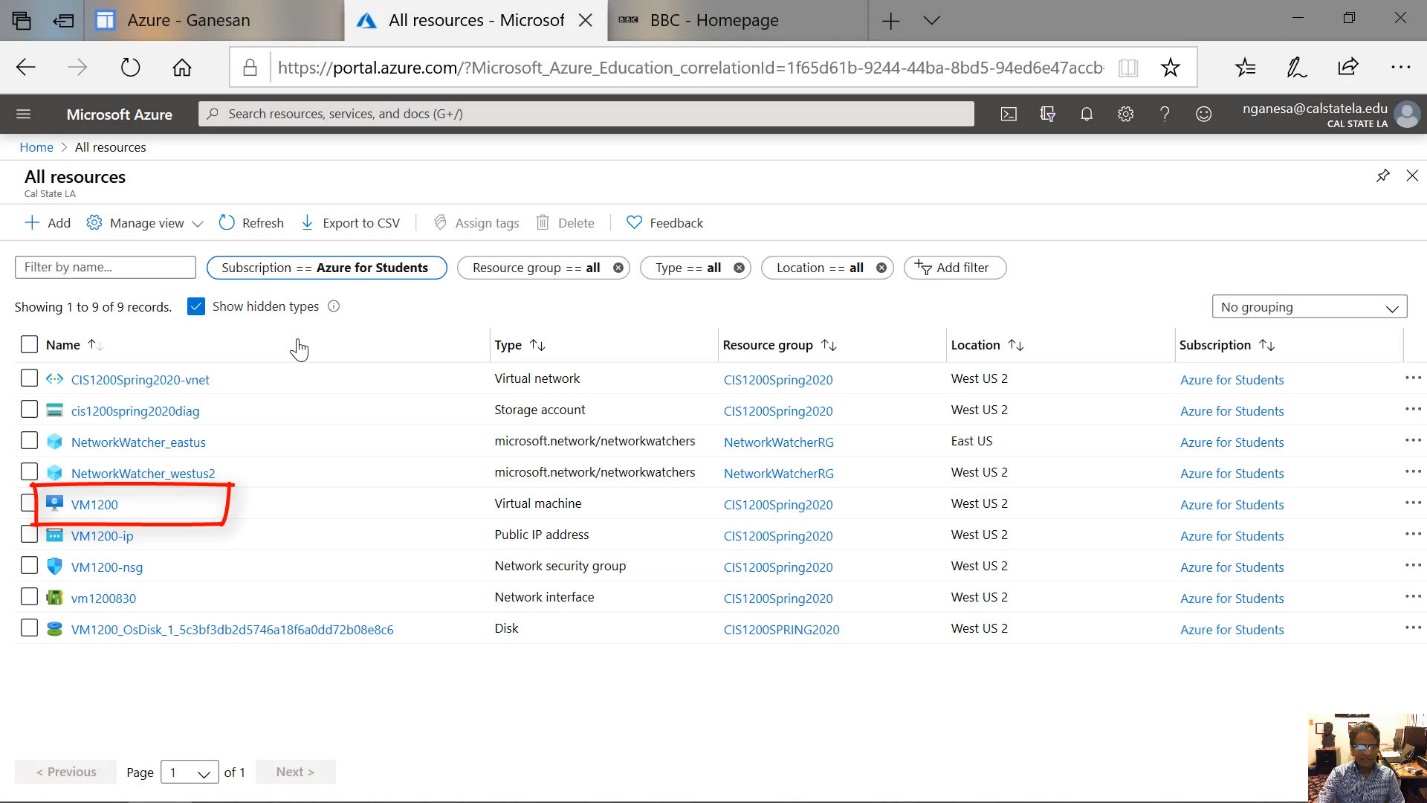
Diagram 8 Selecting the virtual machine
When the VM is chosen, the next screen will display the details of the virtual machine, as shown in the next diagram.
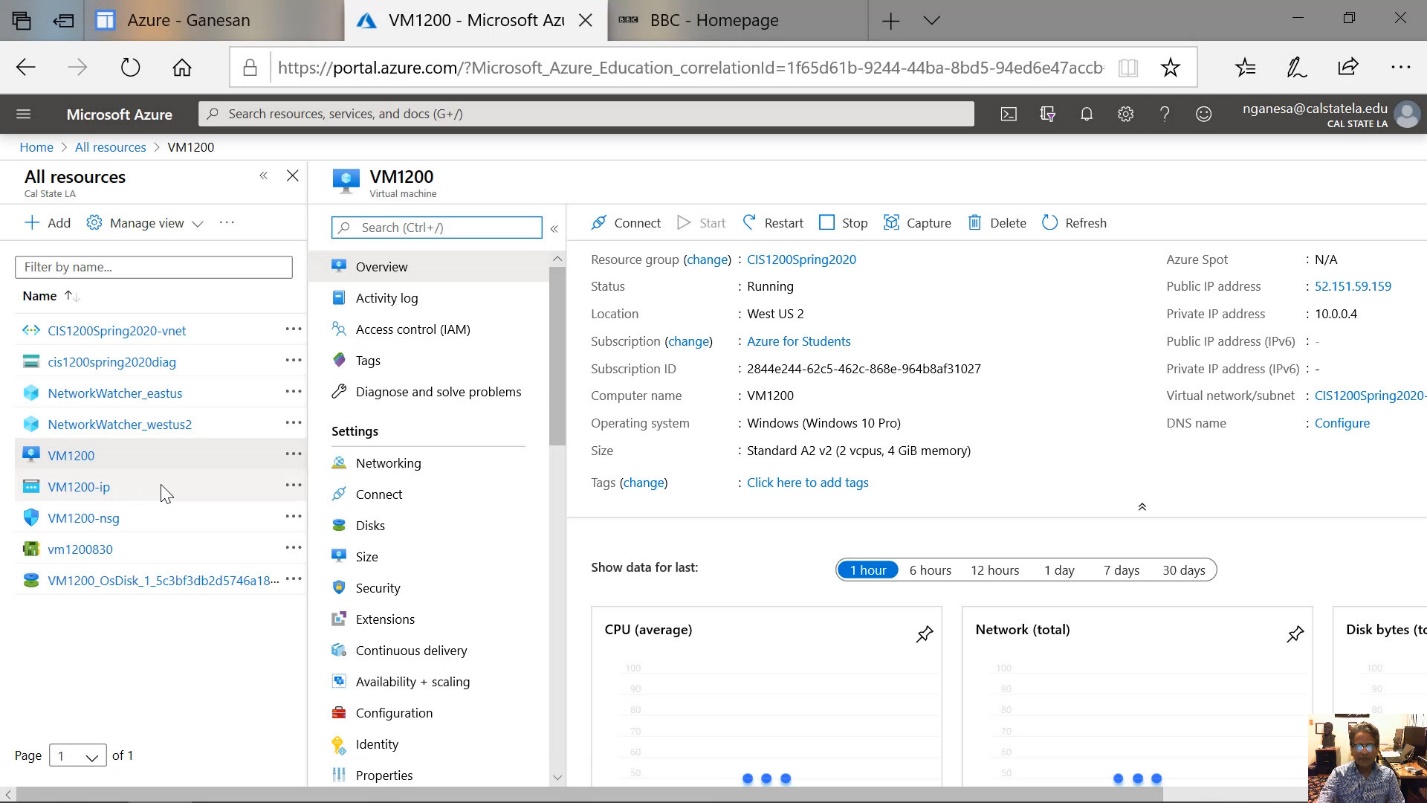
Diagram 9 Virtual machine details
Step 3 Exploring the Commands to Start, Connect, Stop, Restart and Delete Commands
The commands that are useful to manage the virtual machine are displayed near the top of the screen, as shown in the next diagram. In particular, the commands Start, Connect, Stop, Restart, and Delete are likely to be used more frequently than the other commands.
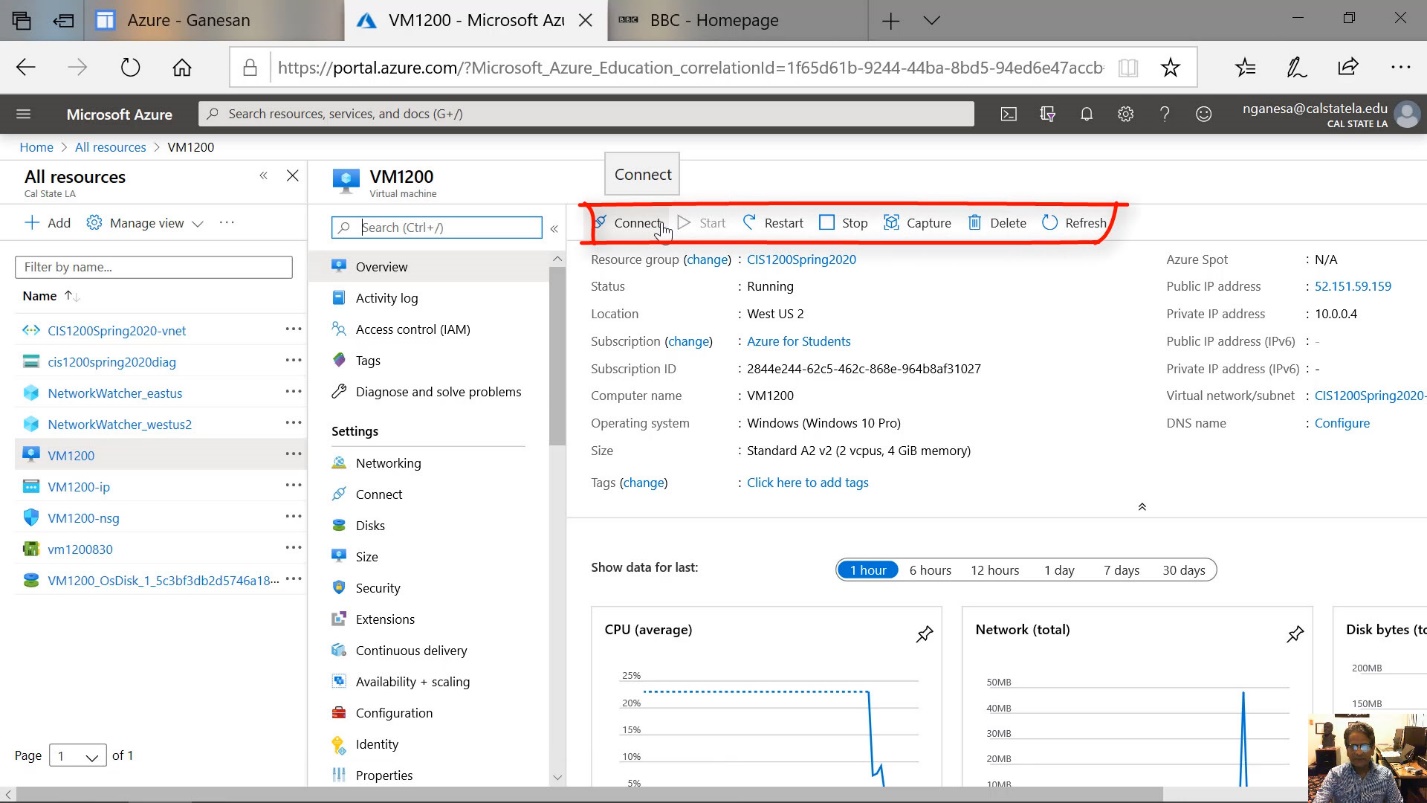
Diagram 10 Commands for managing the virtual machine
Step 4 Taking Note of Other Details on the Screen
The details displayed on the screen include the public IP address and a private IP address. The public and private IP addresses are highliighed in the next two diagrams respectively. The public IP address could be used to access the virtual machine in the future. Also displayed is the private IP address of the virtual machine. This private IP address is used for identifying the virtual machine in the internal network. For this exercise, only the public IP address is relevant.
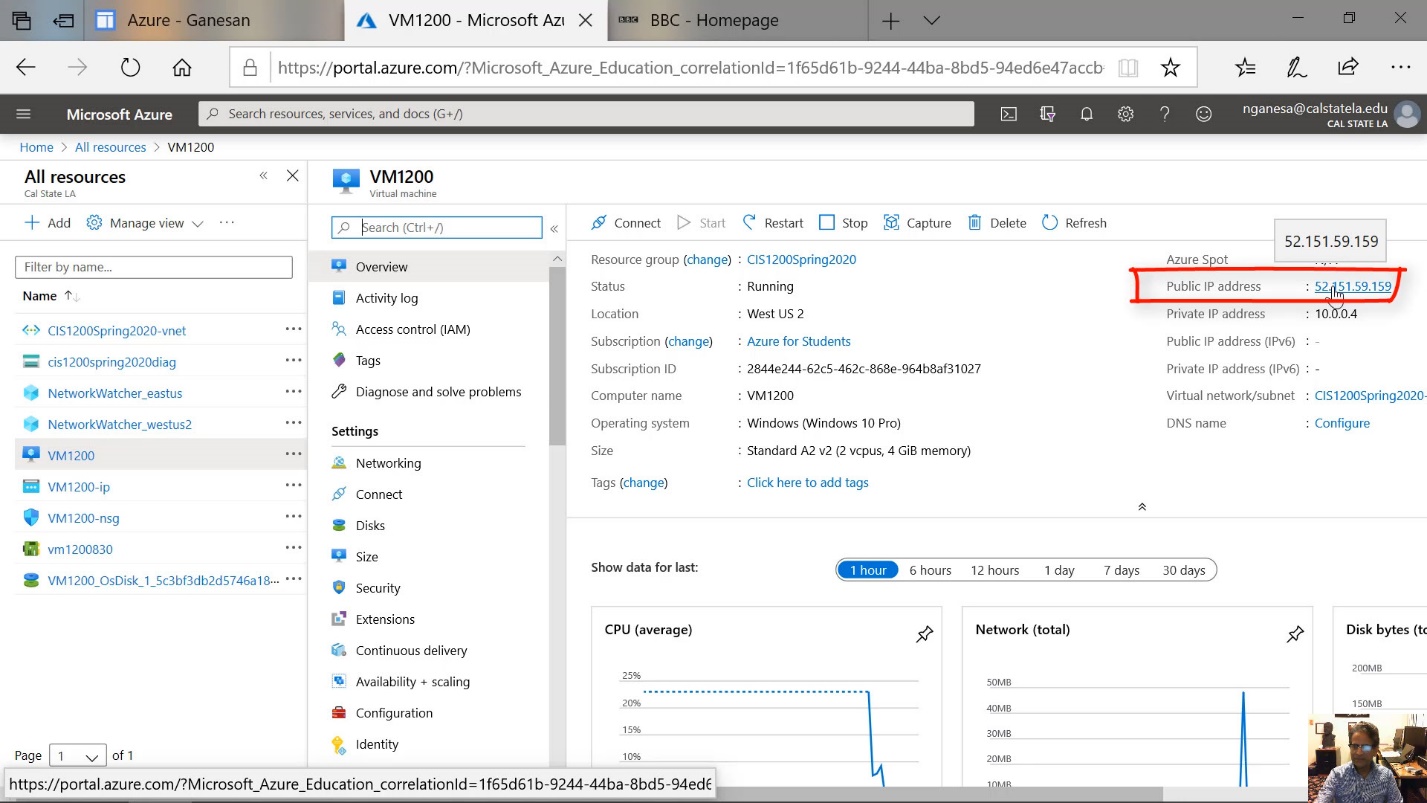
Diagram 11 Public IP address of the virtual machine
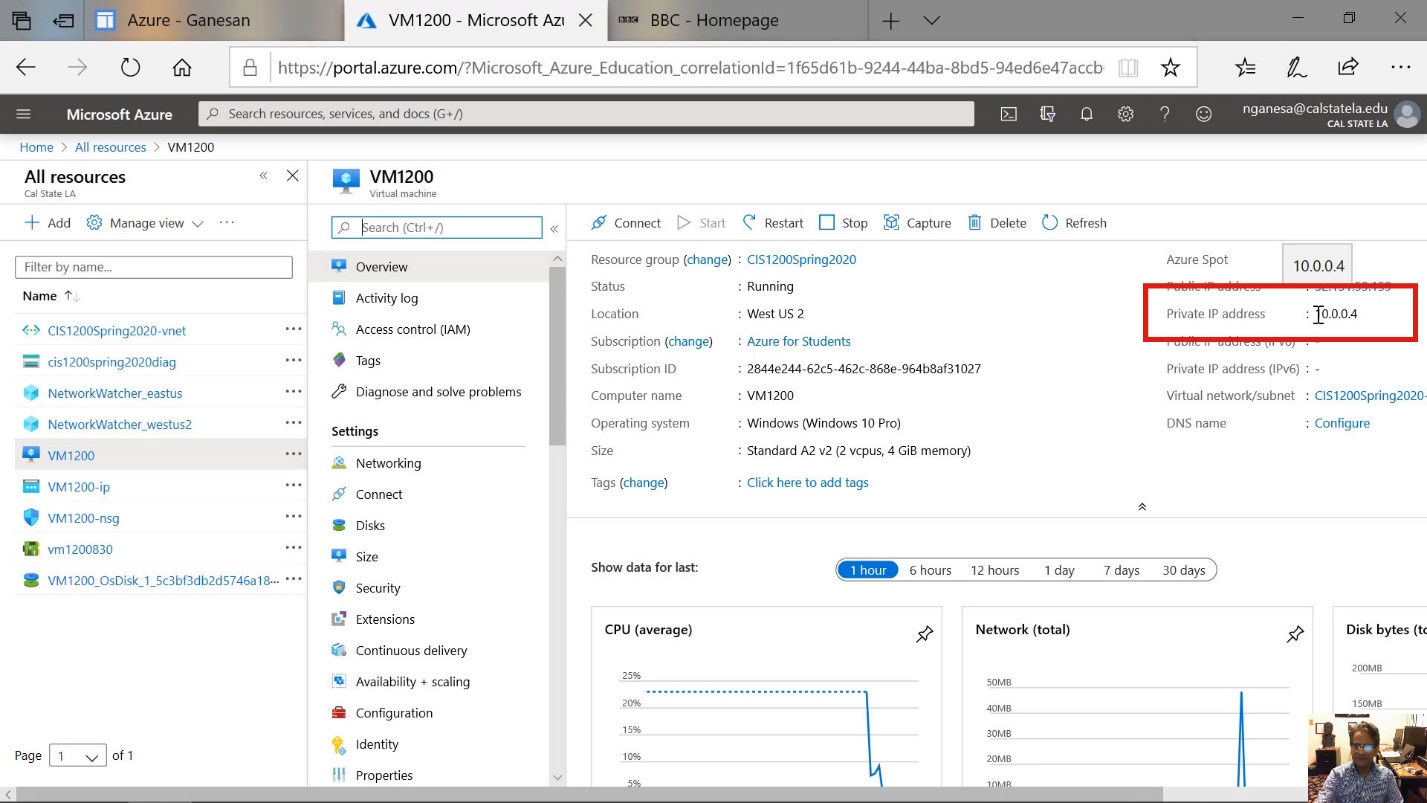
Diagram 12 Private IP address of the virtual machine
Before moving to connect to the virtual machine, a brief explanation of the graphs displayed on the is as follows. These graphs monitor the usage of resources associated with the virtual machine over time. They, in fact, corelate to the charges levied by the cloud service. It is, therefore, important to monitor the usage so appropriate decisions can be made to prudently manage the cost of using the virtual machine. As an example, the CPU usage, network traffic and the disk usage are highlighted in the next diagram.
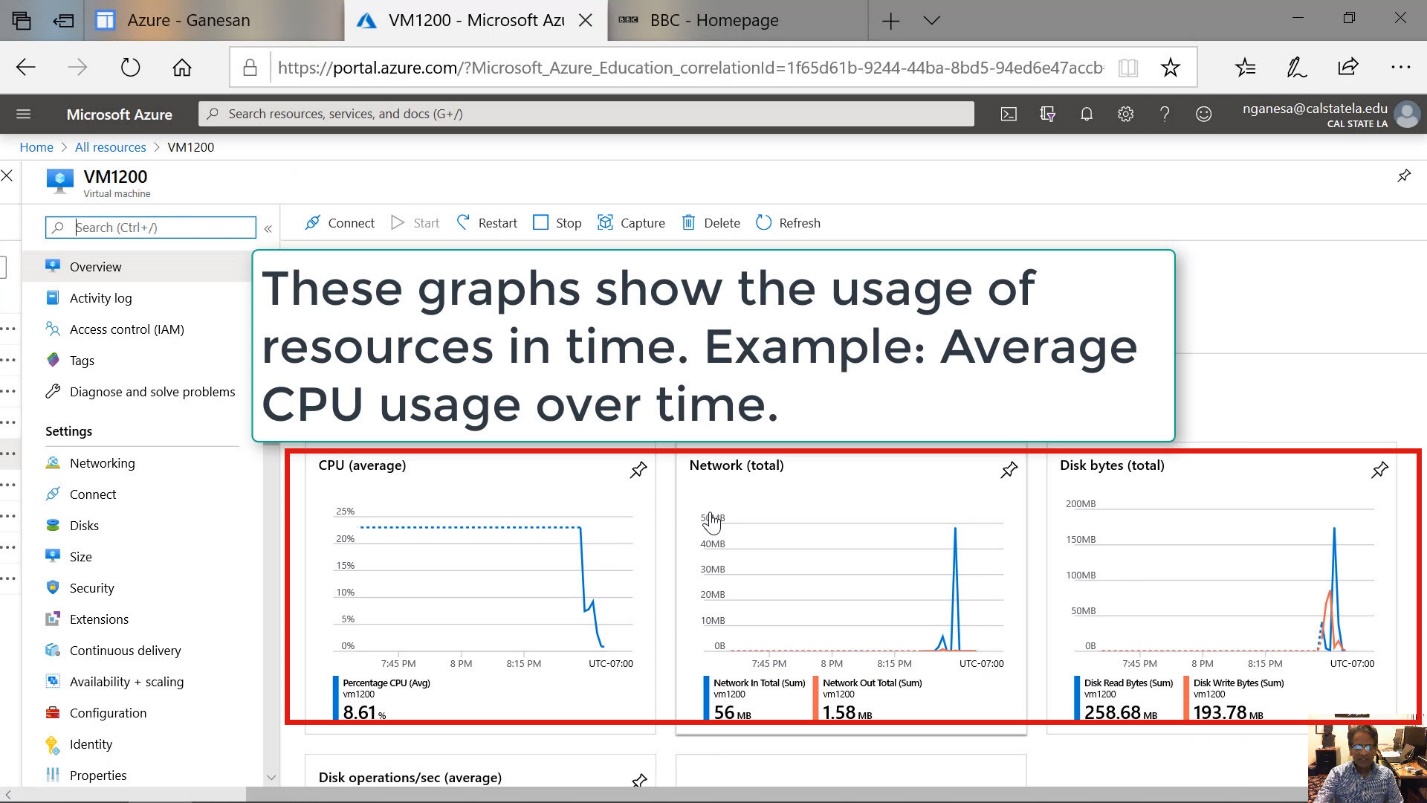
Diagram 13 Graphs showing the usage of resources
Step 5 Initiating the Connection Using RDP
The next step is click on the connect button, as shown in the following diagram. It is important to note that the virtual machine must be running before a user can connect to the machine. If the machine is not running and the screen shows its status as stopped, then it is important to start the machine before attempting to connect to the virtual machine.
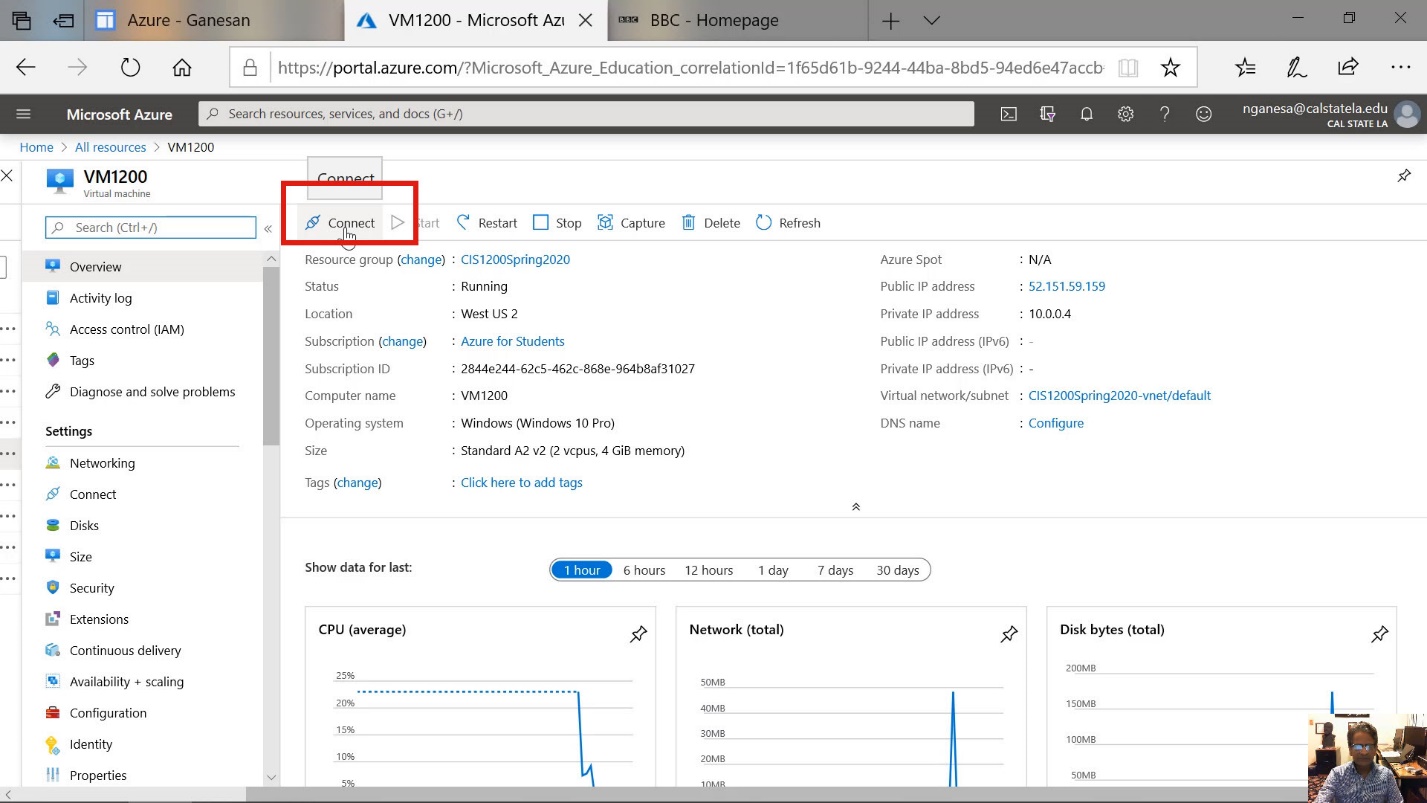
Diagram 14 Clicking on the connect command
When the Connect button is clicked, a dropdown menu will appear, as shown in the next diagram. Select the RDP option from the dropdown menu. This, incidentally, is the protocol used for connecting to the virtual machine.
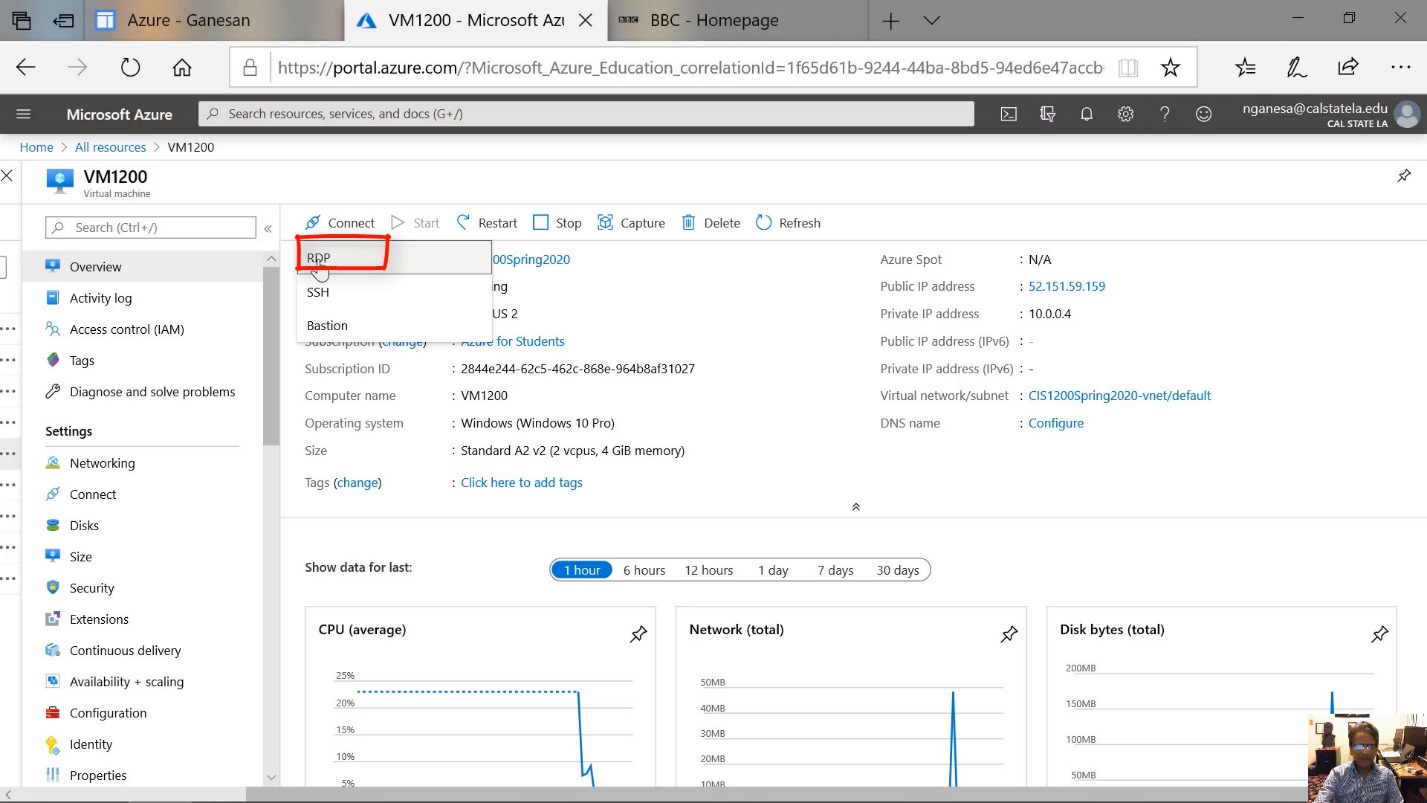
Diagram 15 Selecting RDP as the connection protocol
When RDP is chosen, the screen giving details of the RDP connection will be displayed, as shown in the next diagram. The details include the public IP address and the port number through which the connection is made. In order to establish the connection, a small RDP file will be downloaded and executed. The procedure to execute the downloaded file may vary depending on the browser that is being used. It is important to ensure that the folder containing the file is opened, and the downloaded RDP file is executed.
For those using a Mac computer, an RDP app for Microsoft from the Apple store must be downloaded and installed on the Mac computer. Only then will they be able to execute the downloaded RDP program. For those using the windows computer, this step is not required.
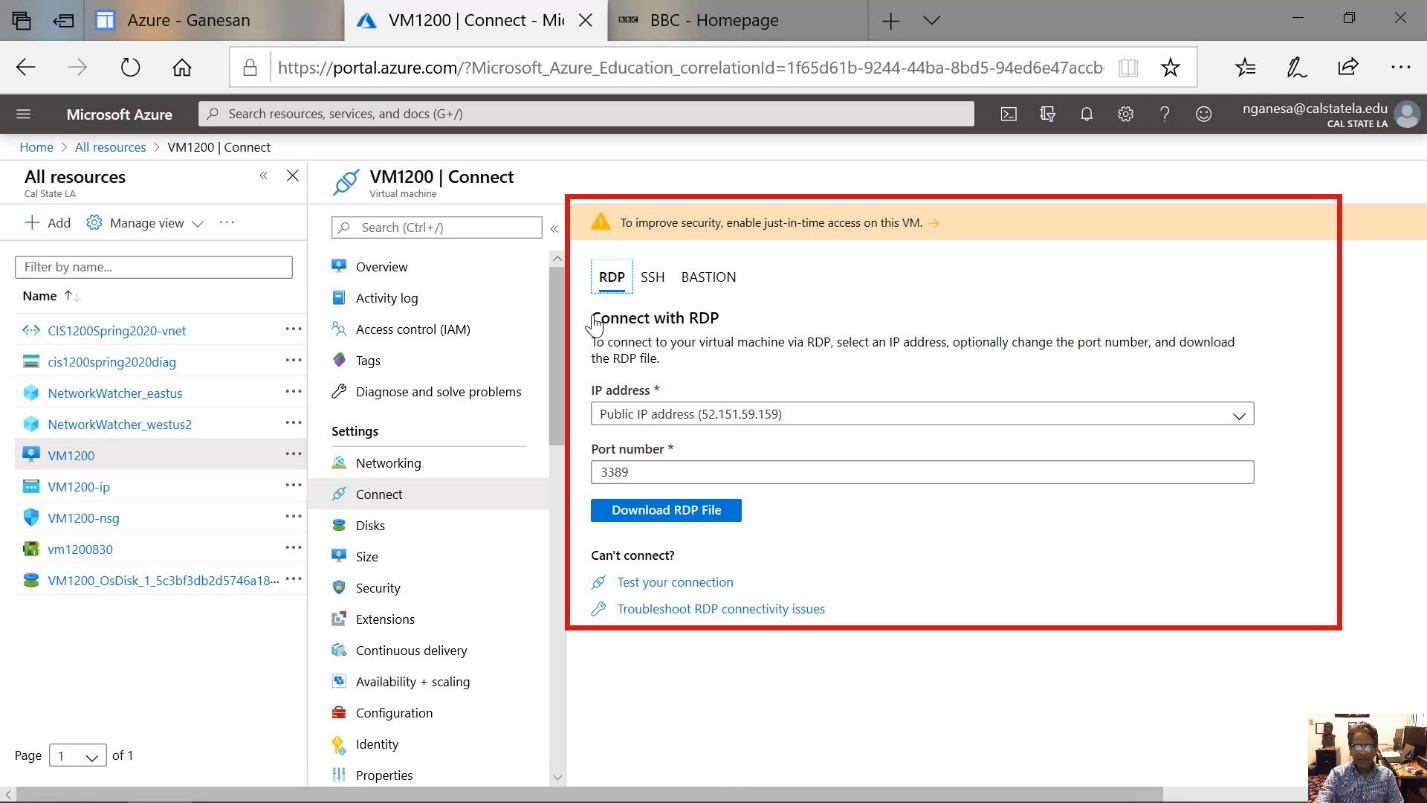
Diagram 16 RDP connection details displayed
Now, click on the Download RDP File button, as shown in the next diagram.
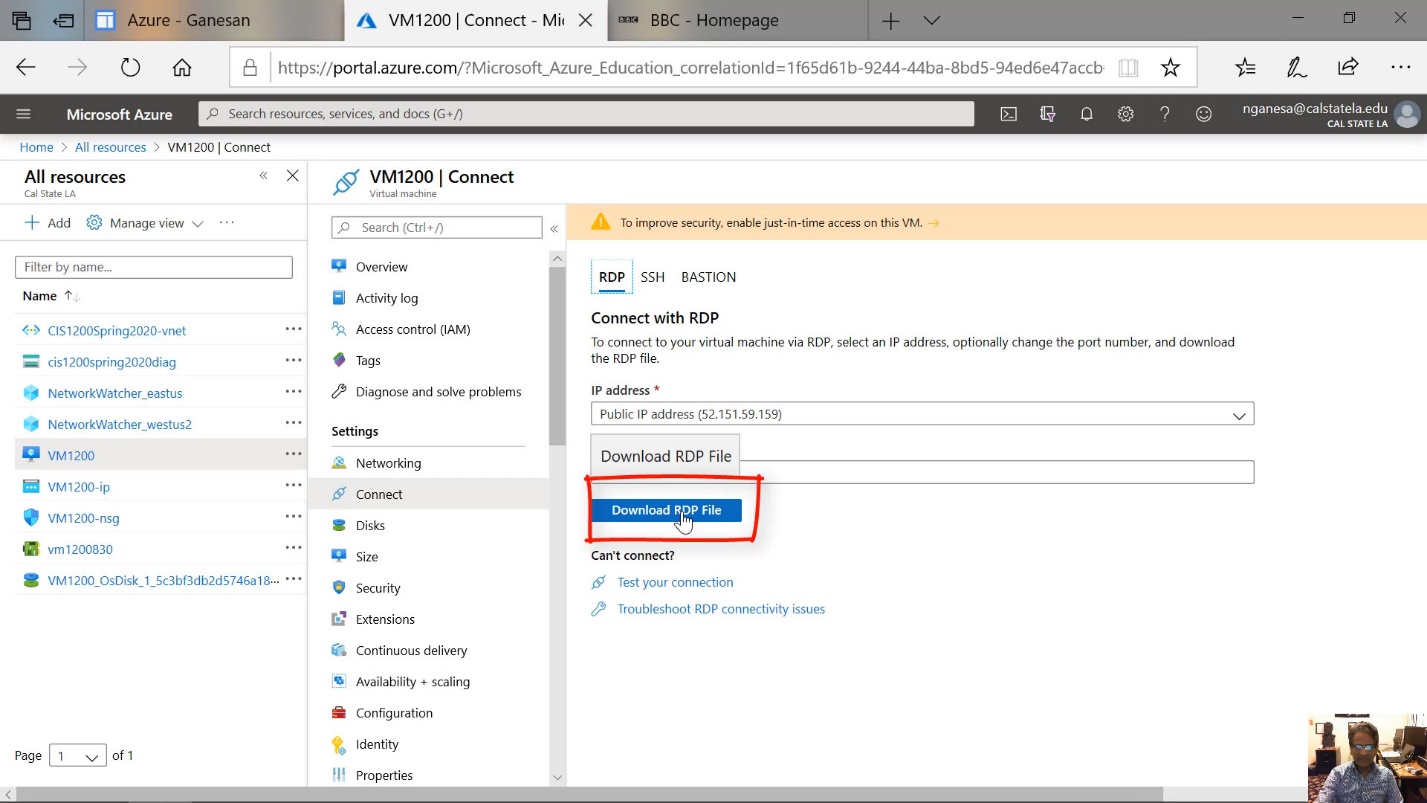
Diagram 17 Downloading the RDP file
The next step applies to the execution of the RDP file on a Windows computer when the file is downloaded using the Edge browser. Click on the button that shows open to execute the RDP file.
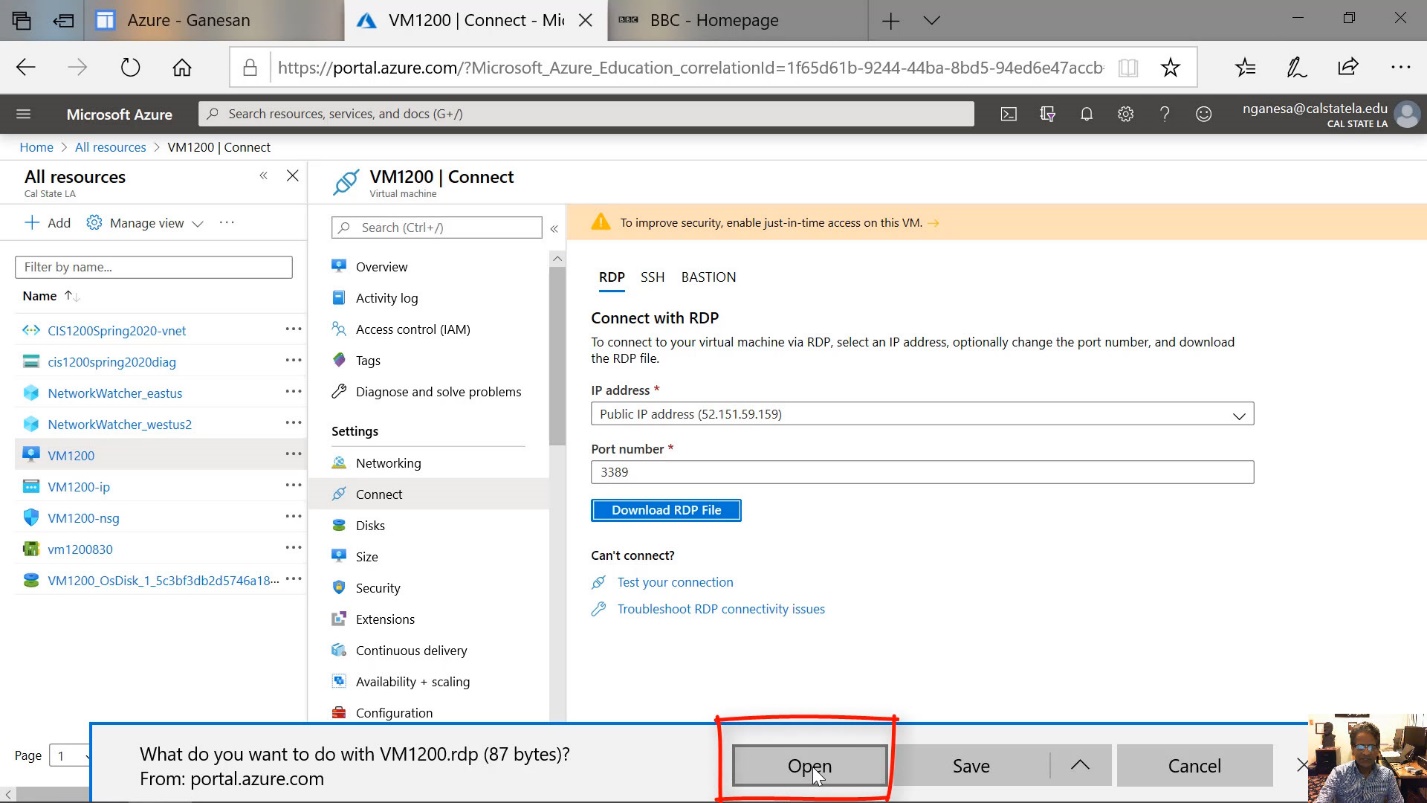
Diagram 18 Opening and executing the RDP file
The remote desktop connection window will now be displayed, as shown in the next diagram. Click on the button labeled Connect to connect to the virtual machine.
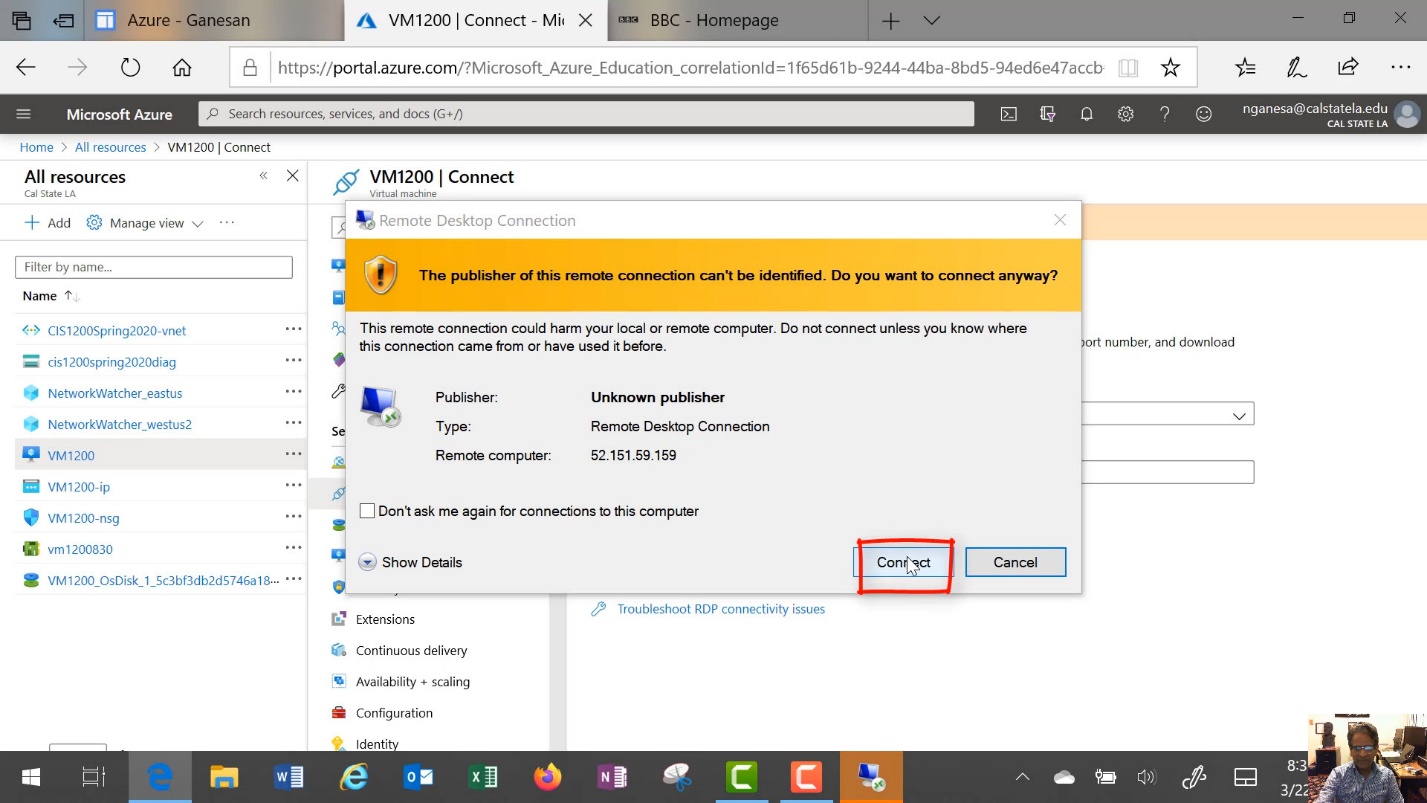
Diagram 22 Connecting to the virtual machine overriding the warning
Step 6 Entering the Credentials and Logging into the VM
At this time, the screen for entering the credentials will be displayed, as shown in the next diagram. It is essential to ensure that proper credentials are entered. These are not the credentials provided by the University, but the credentials of the virtual machine that were specified when the machine was created. In other words, this would be the administrative username and password specified at the time of the creation of the virtual machine. Therefore, it is important to click on the button labeled "more choices", as shown in the following diagram to proceed to the screen where the correct credentials will be entered.
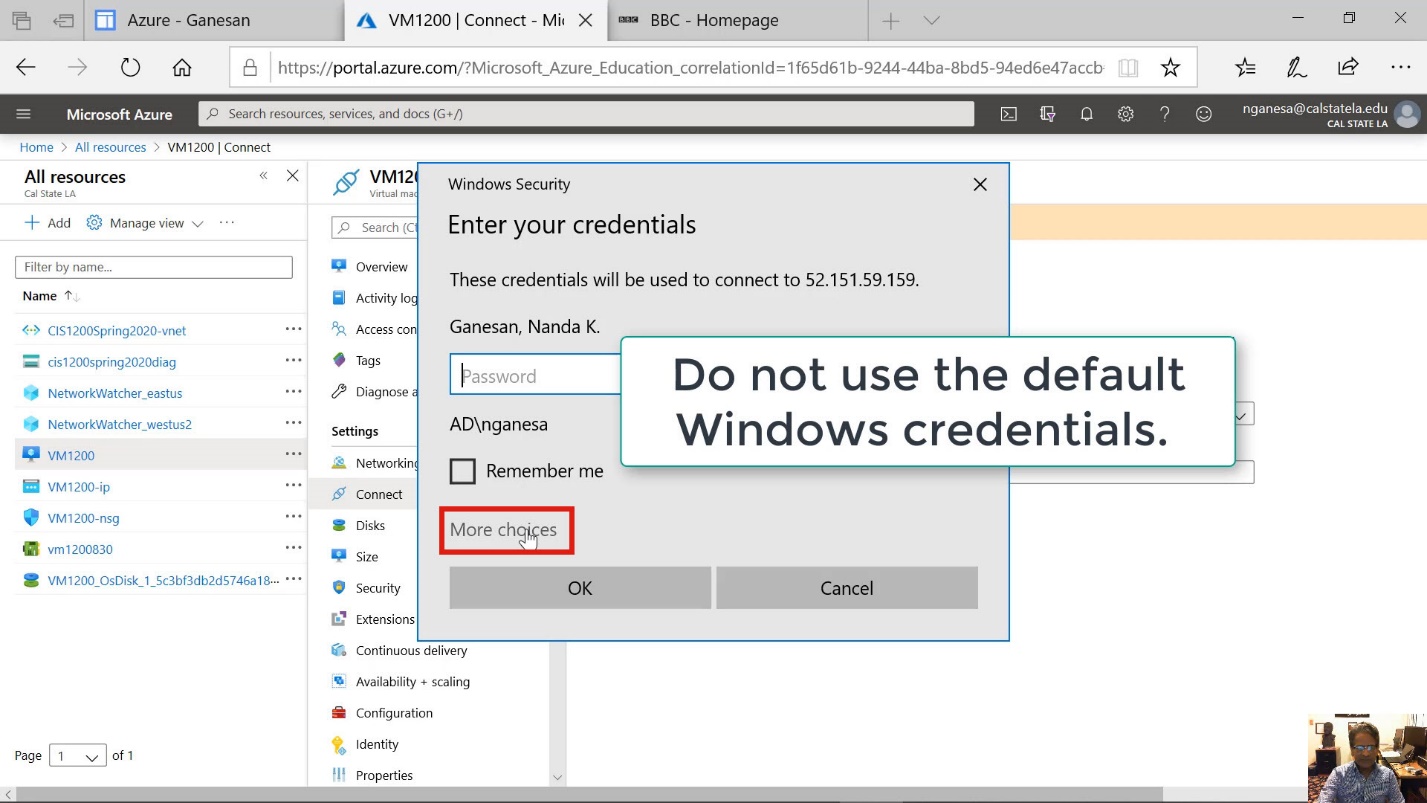
Diagram 19 Screen for Connecting to the virtual machine overriding the warning
Sometimes, it is not necessary to press the more choices option because the "Use a different account option," as shown in the next diagram, may already appear on the screen, especially if the screen resolution is cable of displaying additional information on the screen. Select the "Use a different account" option, as shown in the next diagram.
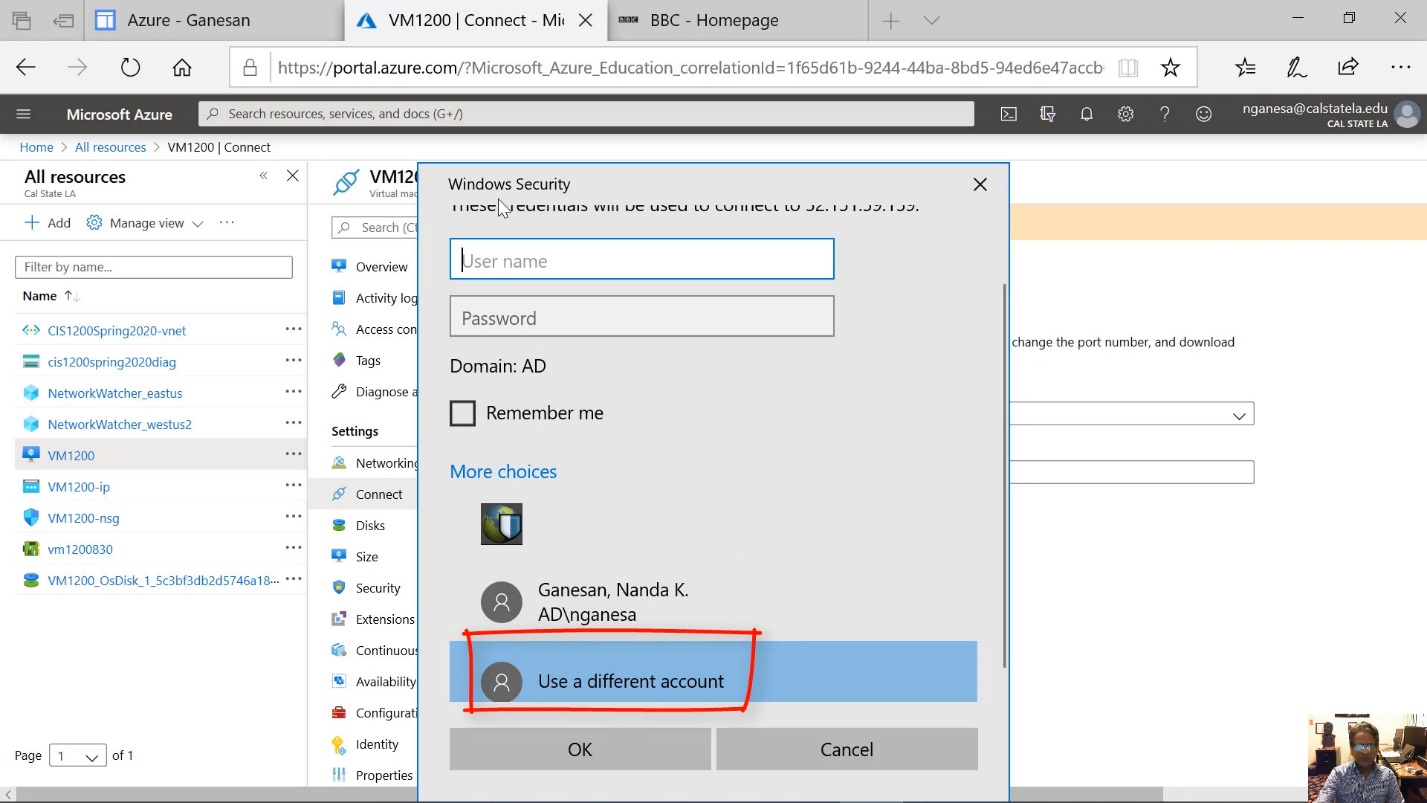
Diagram 20 Using different credentials other than the windows credentials
Now, enter the administrative username and the password, as shown in the next two diagrams.
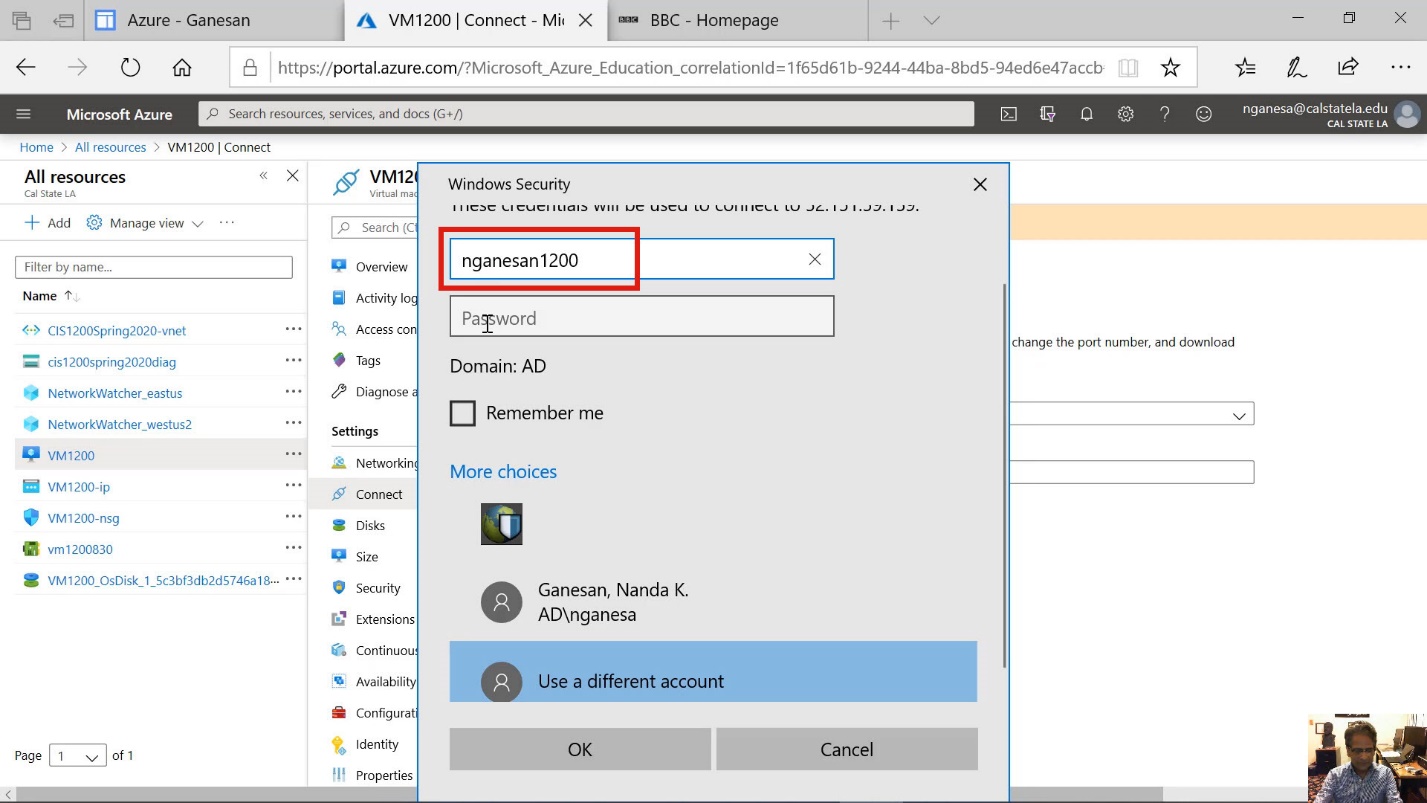
Diagram 21 Providing the username

Diagram 22 Providing the password
Click the OK button after entering the administrative username and password.
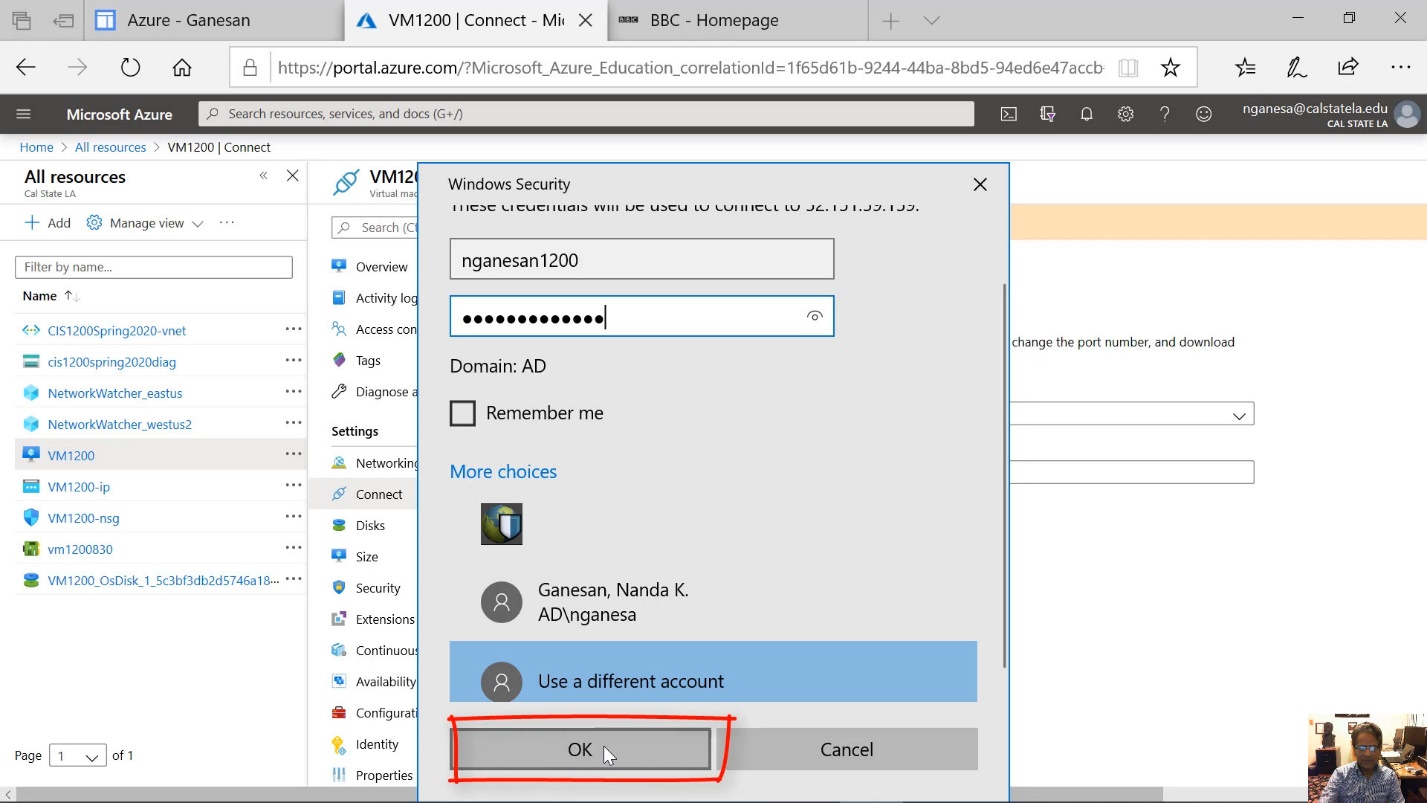
Diagram 23 Providing the password an activating login
The remote desktop connection application will now try to establish a connection to the virtual computer using that username and the password supplied, as shown in the next diagram. A window will display the IP address and the port number that are used to connect to the virtual machine. At a future time, if a connection is to be made using the remote desktop application, the connection can be initiated by using the IP address and the port number. The combination of IP address and port number must be entered, starting with the IP address followed by a colon and then the port number, as shown in the next diagram (52.151.59.159:3389), to connect to the virtual machine.
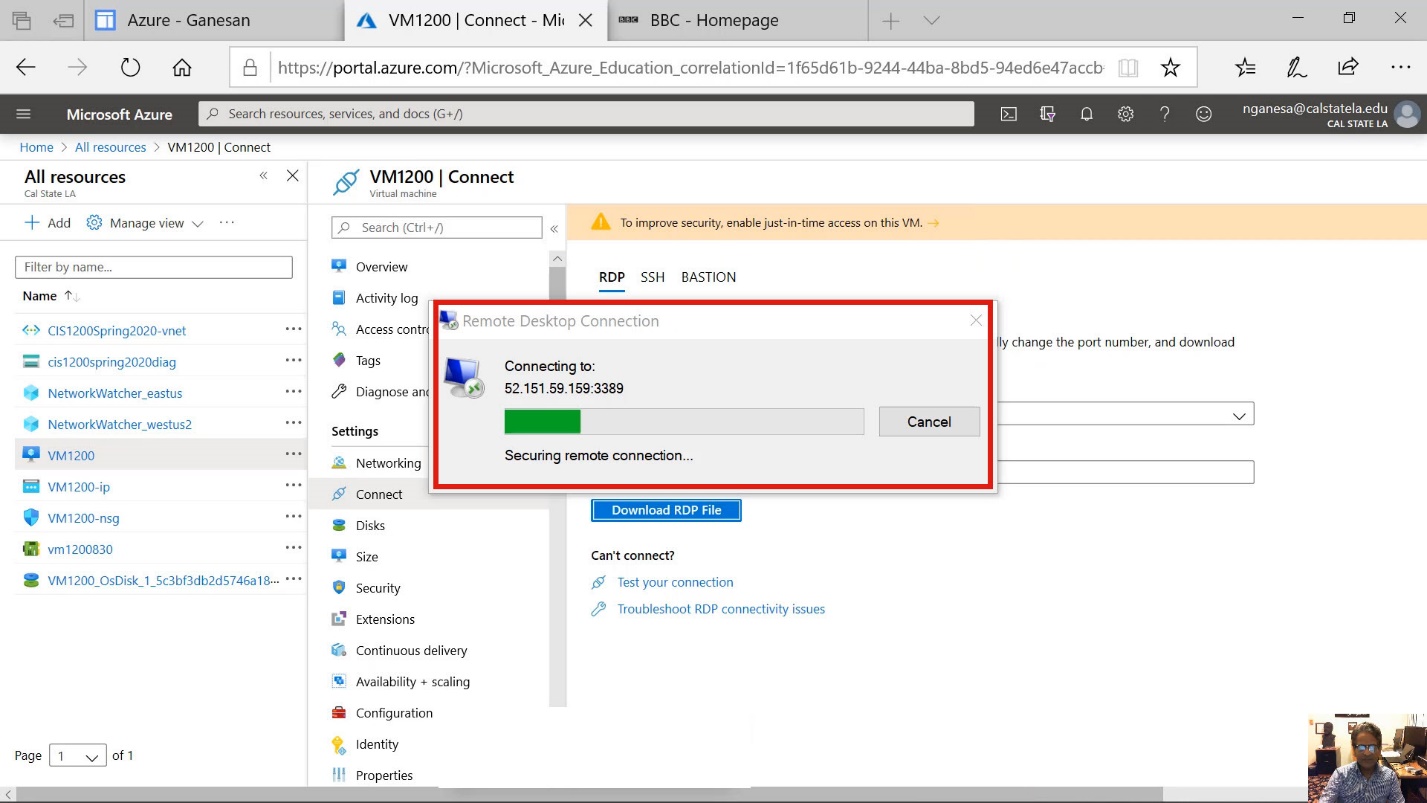
Diagram 24 Remote desktop connection being established
At this stage, A message will displayed, as shown in the next diagram indicating that the virtual machine does not have a security certificate. It is to be expected because the machine was just created by the user, and a security certificate was not established. This is a safety measure to prevent the RDP app from connecting to unauthorized machines. Since the machine is known and secure, click the button labeled yes to continue further.

Diagram 25 Overriding the security warning hunt certificates to connect to the virtual machine
The connection to the remote virtual machine is now established, as shown in the next diagram.
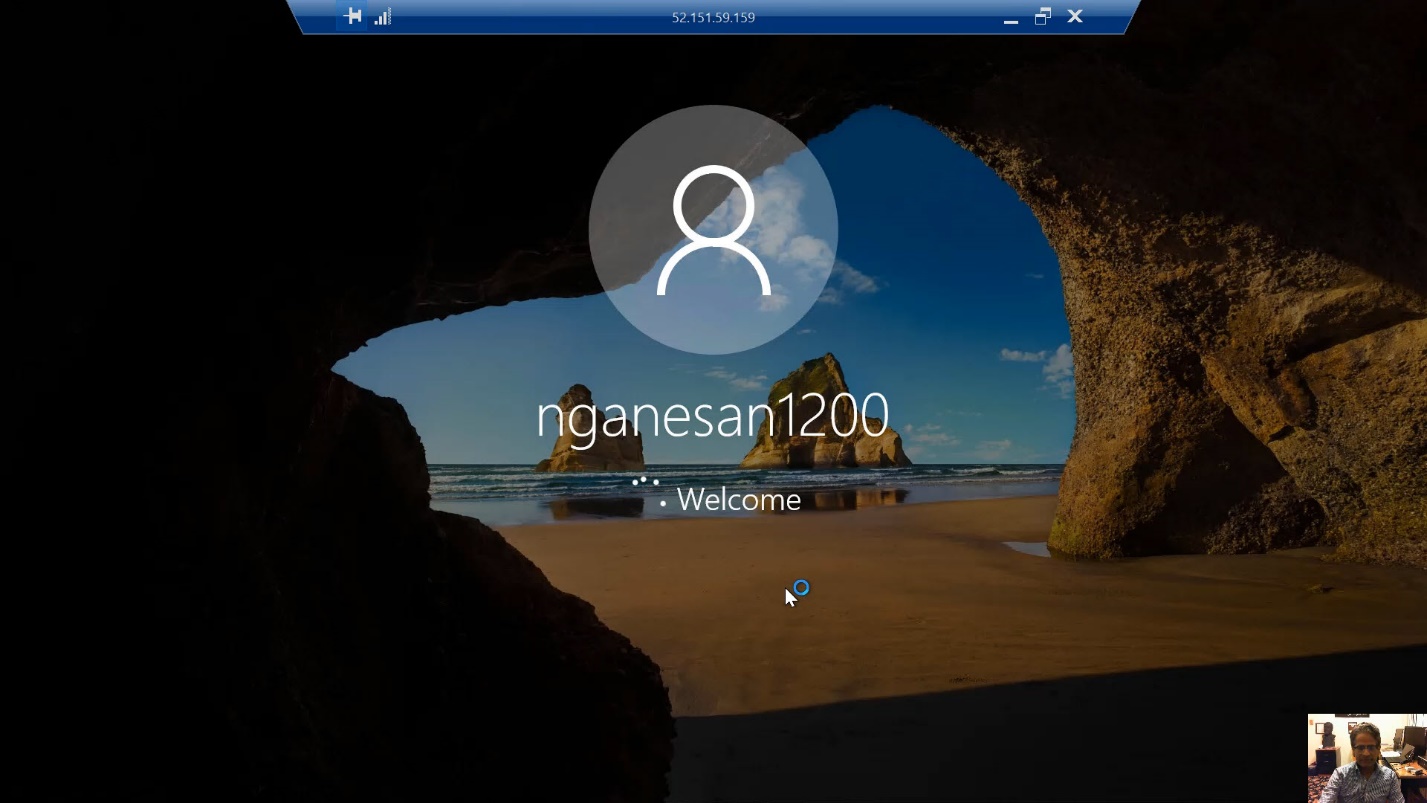
Diagram 26 Initial welcome screen of the Windows 10 virtual machine
Step 7 Initial Configuration of the Windows 10 Virtual Machine
When the virtual machine starts, the initialization page will appear next, as shown in the following diagram. This screen will be the same as the screen that would appear when starting a computer for the first time after installing a fresh operating system. On the first page, the user will be asked to specify the privacy settings for the computer. Again, this is very similar to choosing the privacy settings when a new operating system is installed on a local computer.
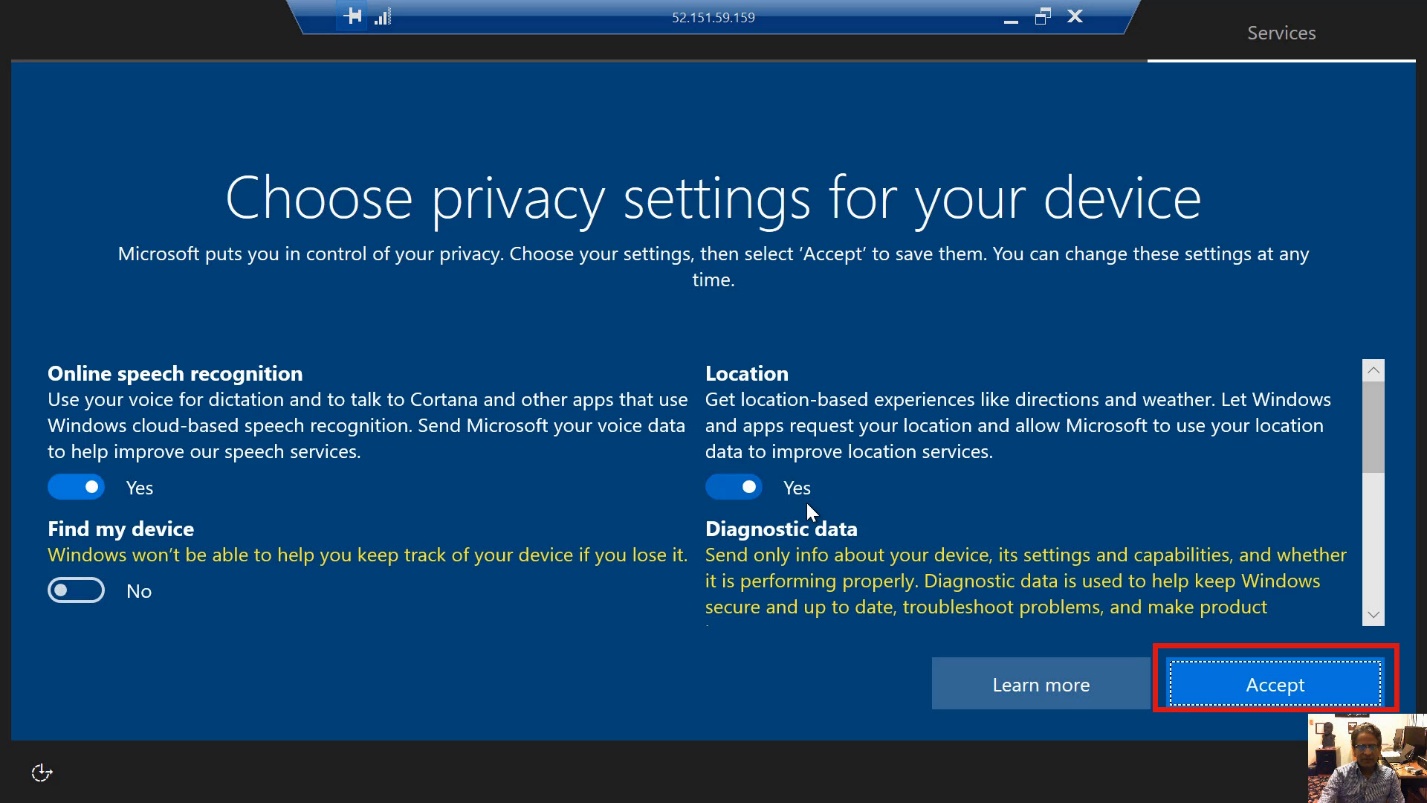
Diagram 27 Choosing the initial privacy settings
When a new operating system is installed and initialized, as in the case of a physical computer, a screen will prompt to asking the user to choose between allowing and not allowing the virtual machine to be discovered by other machines. The decision, in this case, would be to say No because the purpose is to use the virtual machine as a stand-alone computer. Therefore, select the option labeled "No" as shown in the next diagram.

Diagram 28 Declining the discovery option for the network
This would essentially complete the steps to connect to the virtual machine. From this point onwards, the virtual machines will function similarly to a physical computer. In this case, the screen, keyboard, and the mouse will behave as if they were connected directly to the virtual Windows 10 Pro machine.
The RDP app banner that appears on the top of the screen will indicate that the user is now interacting with the virtual machine. When the screen is minimized, the user will see the screen pertaining to the local computer. By switching between these two screens, the user can choose to use either of the two computers.

Diagram 29 Welcome screen after completion of the initial settings
When the browser screen is minimized, the windows screen of the remote computer will become visible. Now, the remote virtual computer is available for use as if it were a local physical computer connected to the local and physical screen, keyboard and mouse.
Step 8 Virtual Machine Ready for Use
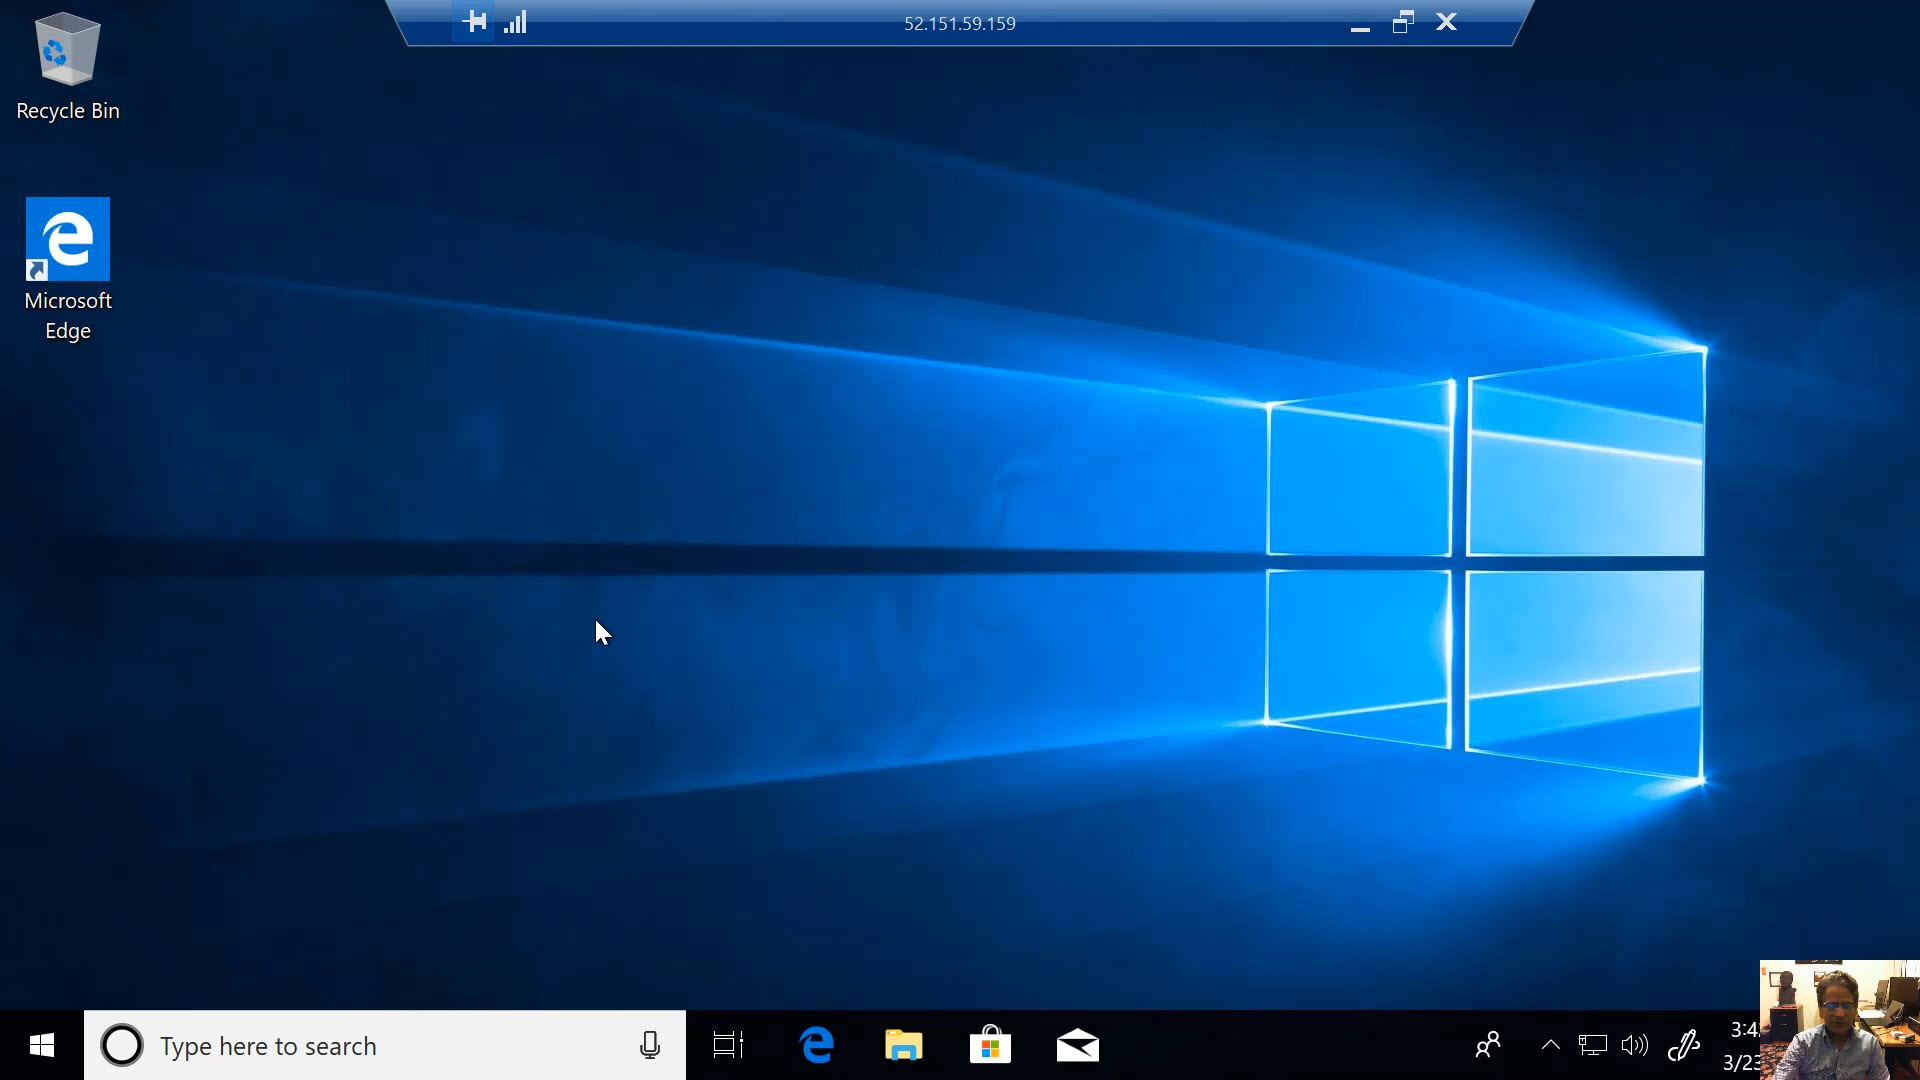
Diagram 30 Windows 10 machine ready for use
In another next tutorial, the step-by-step installation of Microsoft Access on this virtual machine will be presented.
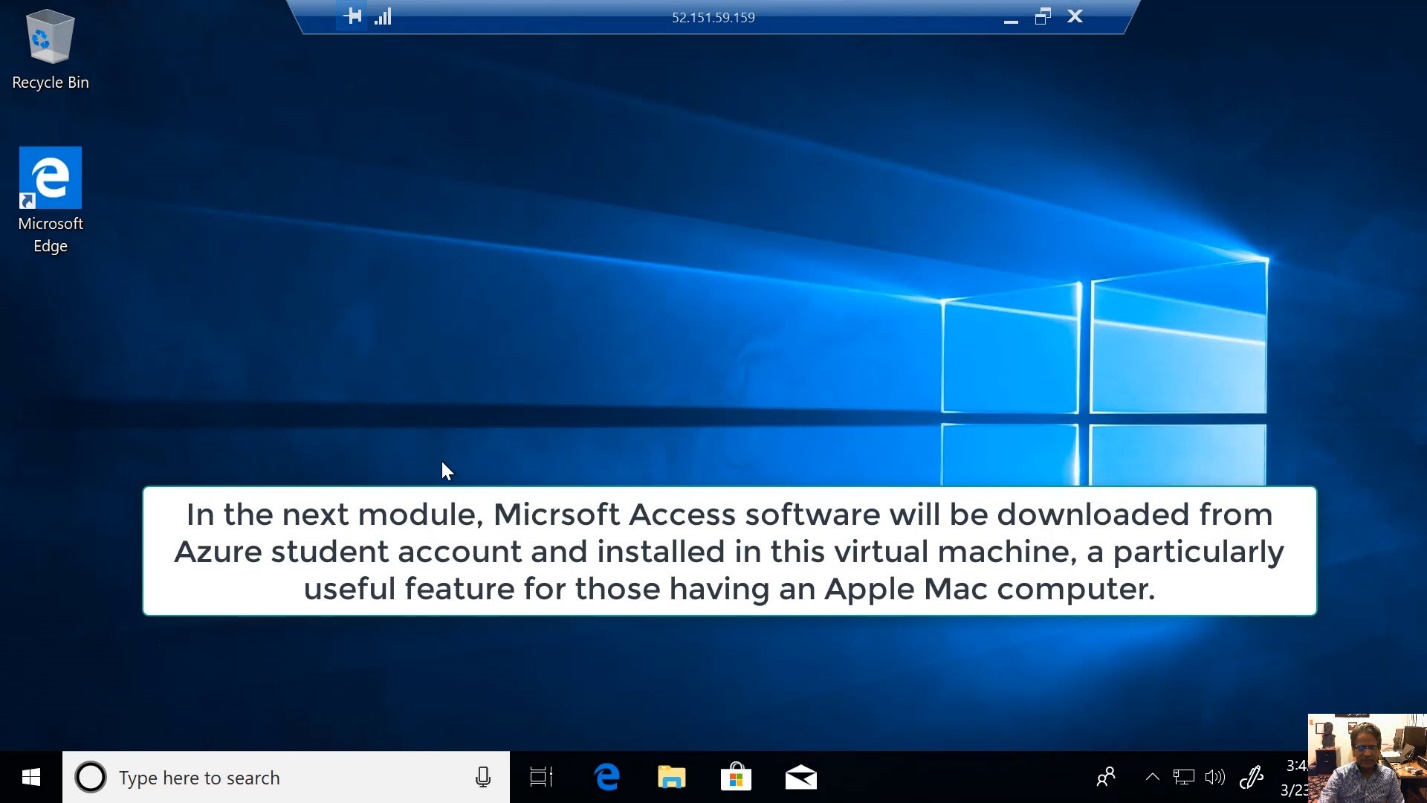
Diagram 31 Next tutorial will demonstrate the installation of Microsoft Access on this VM