Chapter 6: Introduction to Audio
Chapter 6: Introduction to Audio
Sound travels in waves and understanding their characteristics is critical when working with audio. Waves have amplitude (loudness) and frequency (pitch). The higher amp means louder sounds and the higher.
Sample Rate and Bit Depth are used to help determine the quality of the digital audio recording. This is measured in kHz (kilohertz) which refers to the number of samples taken per second, while bits are measuring the resolution or dynamic range of the audio file. Iyou see this setting - try to aim at keeping your sample rates at 44.1 or 48 kHz (which is standard for video and audio production). This means the audio waves at 44.1 kHz have been sampled 44,100 times per second. A lot of sources have this already set as default.
There are many types of audio files, the most common are WAV (Waveform Audio File Format), MP3 (MPEG Audio Layer III), and FLAC (Free Lossless Audio Codec).
- WAV is an uncompressed audio format and retains all the original audio data without any loss or compression. These are usually larger files. They are commonly used in professional audio recordings and editing which means they are compatible with most software and hardware.
- MP3 is a compressed file that discards some audio data to reduce file size. They are smaller in size and commonly used for online music distribution, streaming, and storing music on portable devices.
- FLAC is compressed but preserves the original audio quality. It offers high-quality audio similar to WAV but at a significantly smaller file size. This file type is preferred for digital archiving because it provides the benefits of a lossless format while reducing storage space.
In this chapter, we will be reviewing different types of devices for recording sound and three different ways to set up your sound equipment to make for a decent interview recording.
There are several types of microphones but the ones most related to the projects in this class and for interview, podcasting, and short film production, we will focus on the following.
- Condenser
- Dynamic
- Ribbon
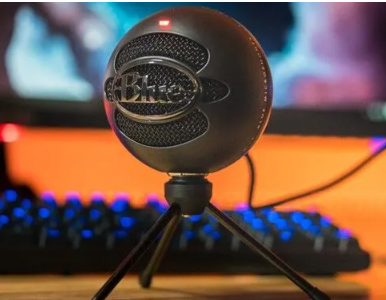
(Image Source: PC Guide)
Condenser Microphones use a diaphragm placed close to a backplate forming a capacitor. When sound hits it, it vibrates which creates the electrical signal. These types of microphones are highly sensitive and capture a wide range of frequencies to provide clear sound. They typically require external power through batteries or a phantom power supply like an audio interface or mixer. However, it's becoming more common to see these available as USB connections. These microphones are best for studio recording, and capturing vocals and instruments. Our personal favorite is the Blue Snowball iCE Condenser (approximately $40) or the Rode NT1 (approximately $270).
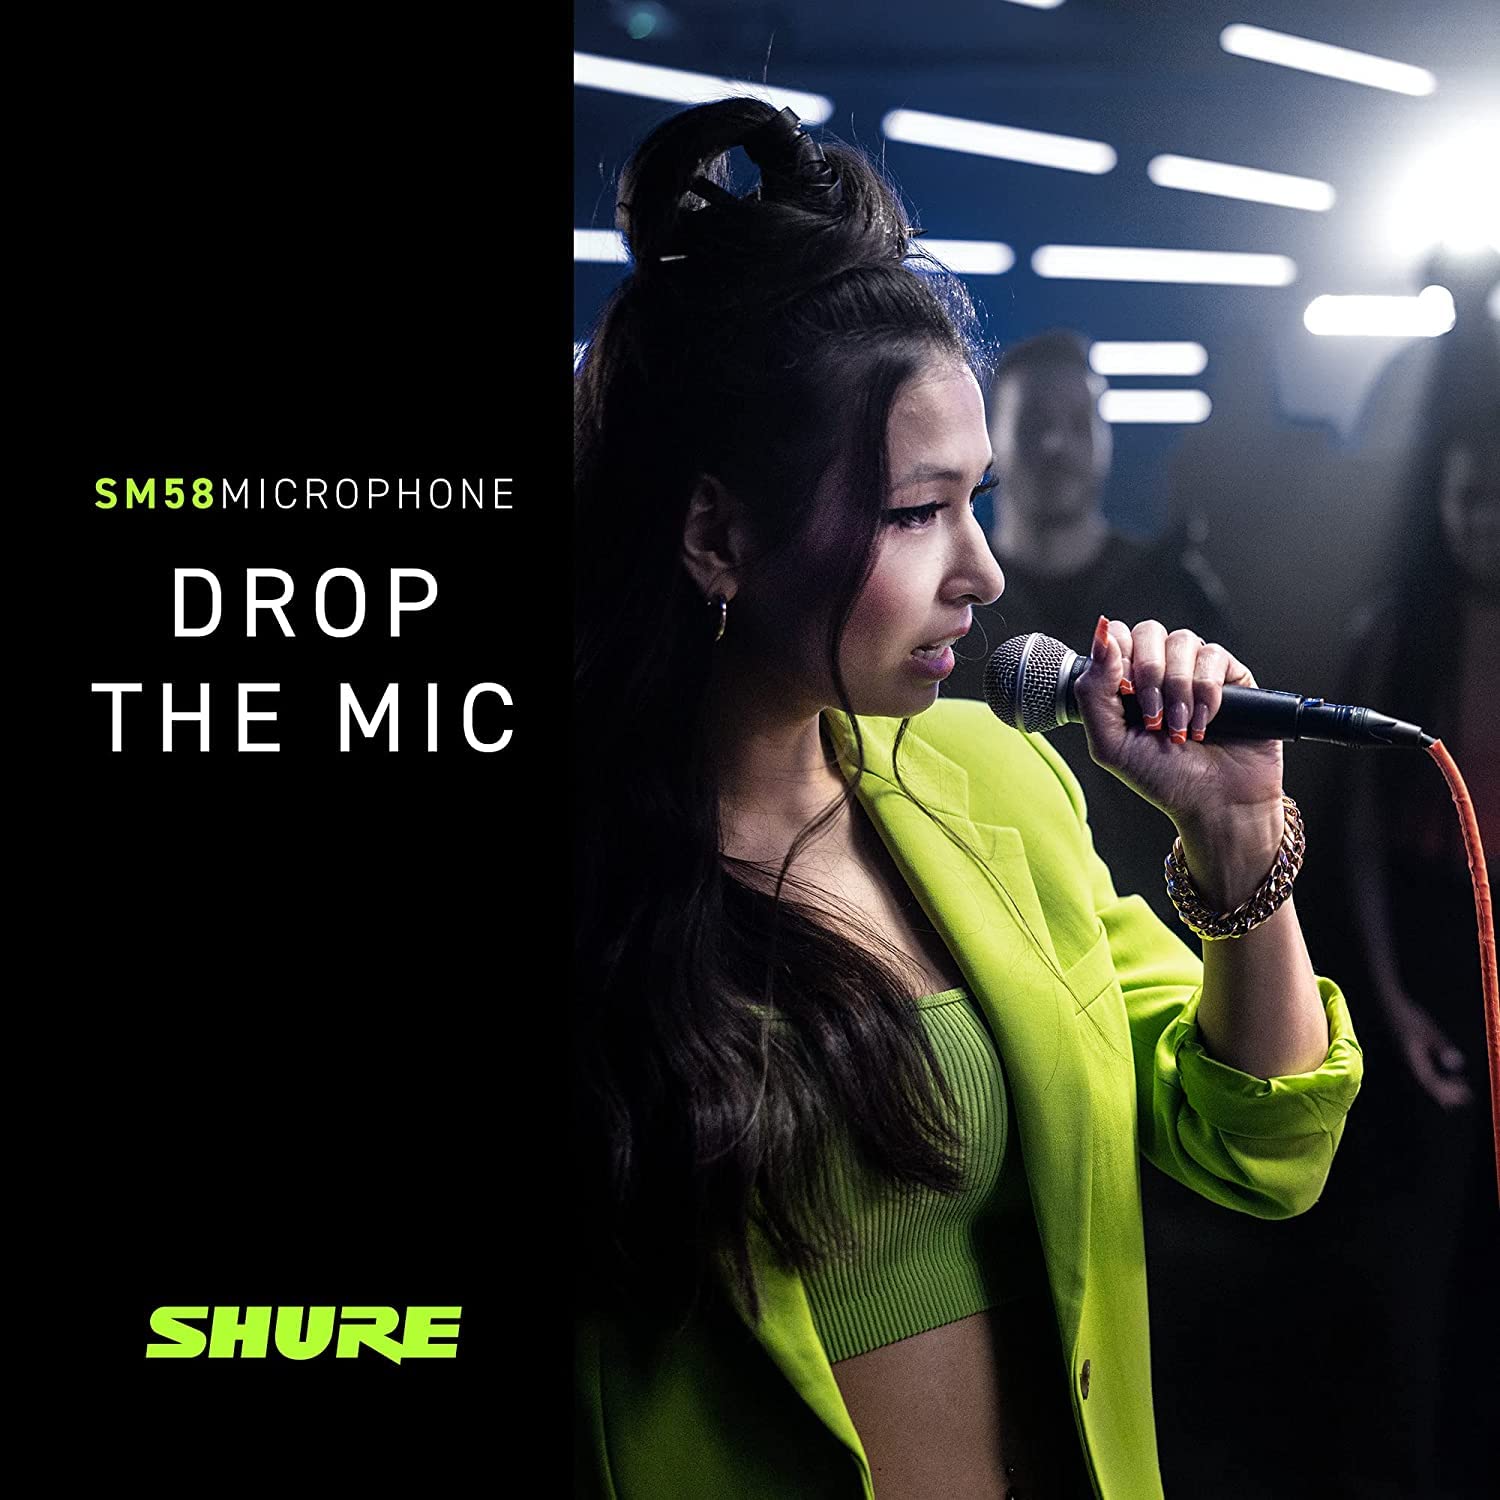
(Source: Shure)
Dynamic Microphones use a coil of wire attached to a diaphragm, which moves within a magnetic field when sound hits, generating the electrical signal. These microphones can handle high sound pressure without distortion, making them better for live performances and recording loud sound sources. They are less sensitive compared to condenser microphones but may not capture as clearly or precisely. They are best for stage and live performances. Our favorite is anything Shure but there are a lot of great options available.
Ribbon Microphones use a thin metal ribbon suspended within a magnetic field. When sound waves hit the ribbon, it creates an electrical signal. These have a "smooth / warm" sound, giving a vintage sound. They are sensitive to both high and low frequencies and are delicate. They can be damaged if exposed to too high of pitch or rough handling. Best for studio performances - especially acoustic.
An audio interface is a device that connects your microphone(s) to other audio gear and computers. Their primary job is to convert analog audio signals into digital data that computers can process and store. Fortunately, most computers are advanced enough that using a USB condenser microphone is all you need to create a basic audio file (e.g. interview or narrating an audiobook). However, if you plan on recording multiple sources (this could be multiple people or include instruments), an interface is needed to help maintain the balance and quality between each of your sources (inputs).
The location of your space will make a significant impact on your sound quality. Factors like room acoustics, background noise, and microphone placement all play a crucial role. Here are some tips to find the best location:
- Find a quiet place (if you have animals or kids, try to find a safe place for them or invite someone you trust to watch them so that they won't interrupt your recording). If that's not an option for you, don't worry. Just be prepared to take several takes and piece together your recording in post-production.
- Look for carpeted areas or spaces that have thick furniture or curtains to help absorb sound. Some options
- If you have a walk-in closet and are only recording audio, that is a great space since the clothes around you will absorb sound. This might not be the best option if you are recording video since you might not want your closet in view.
- If you have a garage, set up your small studio in the back of your car while in the garage (unless the weather permits). Just make sure that you don't have any sounds from your car that will make it into the background (e.g. dinging noise from leaving a door open, car ignition - it's best to not have the car running, etc.)
When recording interviews, there are a variety of setups you can use that will help create a decent-quality interview. For example:
Basic Audio Setup (Best for In-Person)
Things you will need: 1 condenser microphone (USB specific), 1 USB-C to USB Audio Adapter (for Android users) OR 1 USB-C to USB Audio Adapter AND an Apple Lightning to USB Cable (for iPhone users) (note this method doesn't always work with Blue devices - Snowball or Yeti - reviews on this vary), a charged mobile device.
Using your voice recorder that's already installed on your mobile phone, connect your microphone to your phone using the appropriate adapter listed above. Your phone should recognize that you've switched to a recording device. Since you are using the sound input of your phone, you will need to disconnect the cable from your phone to play back the audio recording.
Basic Audio Setup (Best for Online)
Things you will need: 1 condenser microphone (USB), headphones, and Zoom (free accounts can record up to 50 minutes). If you are recording multiple voices/people, you should set up each person with their own setup (1 mic and headphones per person) all using the same Zoom channel.
Make sure you do your audio and sound check on Zoom so that you are using the appropriate microphone and not the internal microphone on your computer (these aren't usually good microphones). Using the advanced setting for each speaker, you can customize the sensitivity of the sound depending on their space. Here's a guide on how to adjust that.
Advanced Audio Setup (Lower Budget)
Things you will need: microphones (1 for each speaker) with boom arm and pop filters to help control the microphone range and avoid bumping the device while talking, audio interface (that supports all the microphones needed), XLR cables to connect interface and microphones, USB and power source (to connect the interface to computer), Recording software on the computer (try Audacity or Open Broadcast Software, they are free options). Then, make sure that you have properly synced each microphone on the interface to the speaker (this is using the gain on the microphone or the audio interface). Then, record using the software settings.